
Co-Sell
Manage Co-Sell Opportunities directly from your Salesforce.
Prerequisites
- Ensure completion of AWS Co-Sell Cloud Setup for syncing APN Opportunities to the Clazar backend.
- Please ensure that you have connected the Salesforce App and installed the Salesforce widget app prior to proceeding.
Understanding Clazar Co-Sell with Salesforce
Enhance your collaboration and sales management with Clazar Co-Sell's seamless integration with Salesforce. This integration empowers users to leverage the collective capabilities of Clazar, Co-Sell, and Salesforce, offering a centralized platform for efficient sales and partnership management in one place.
Adding Widget to Salesforce Opportunity Record Page
Assuming you have already installed the Clazar Widget App in your Salesforce account, follow these steps to add the Co-Sell Widget component to the Salesforce Opportunity record page:
Step 1: Navigate to Sales View and Go to the Opportunity Tab.
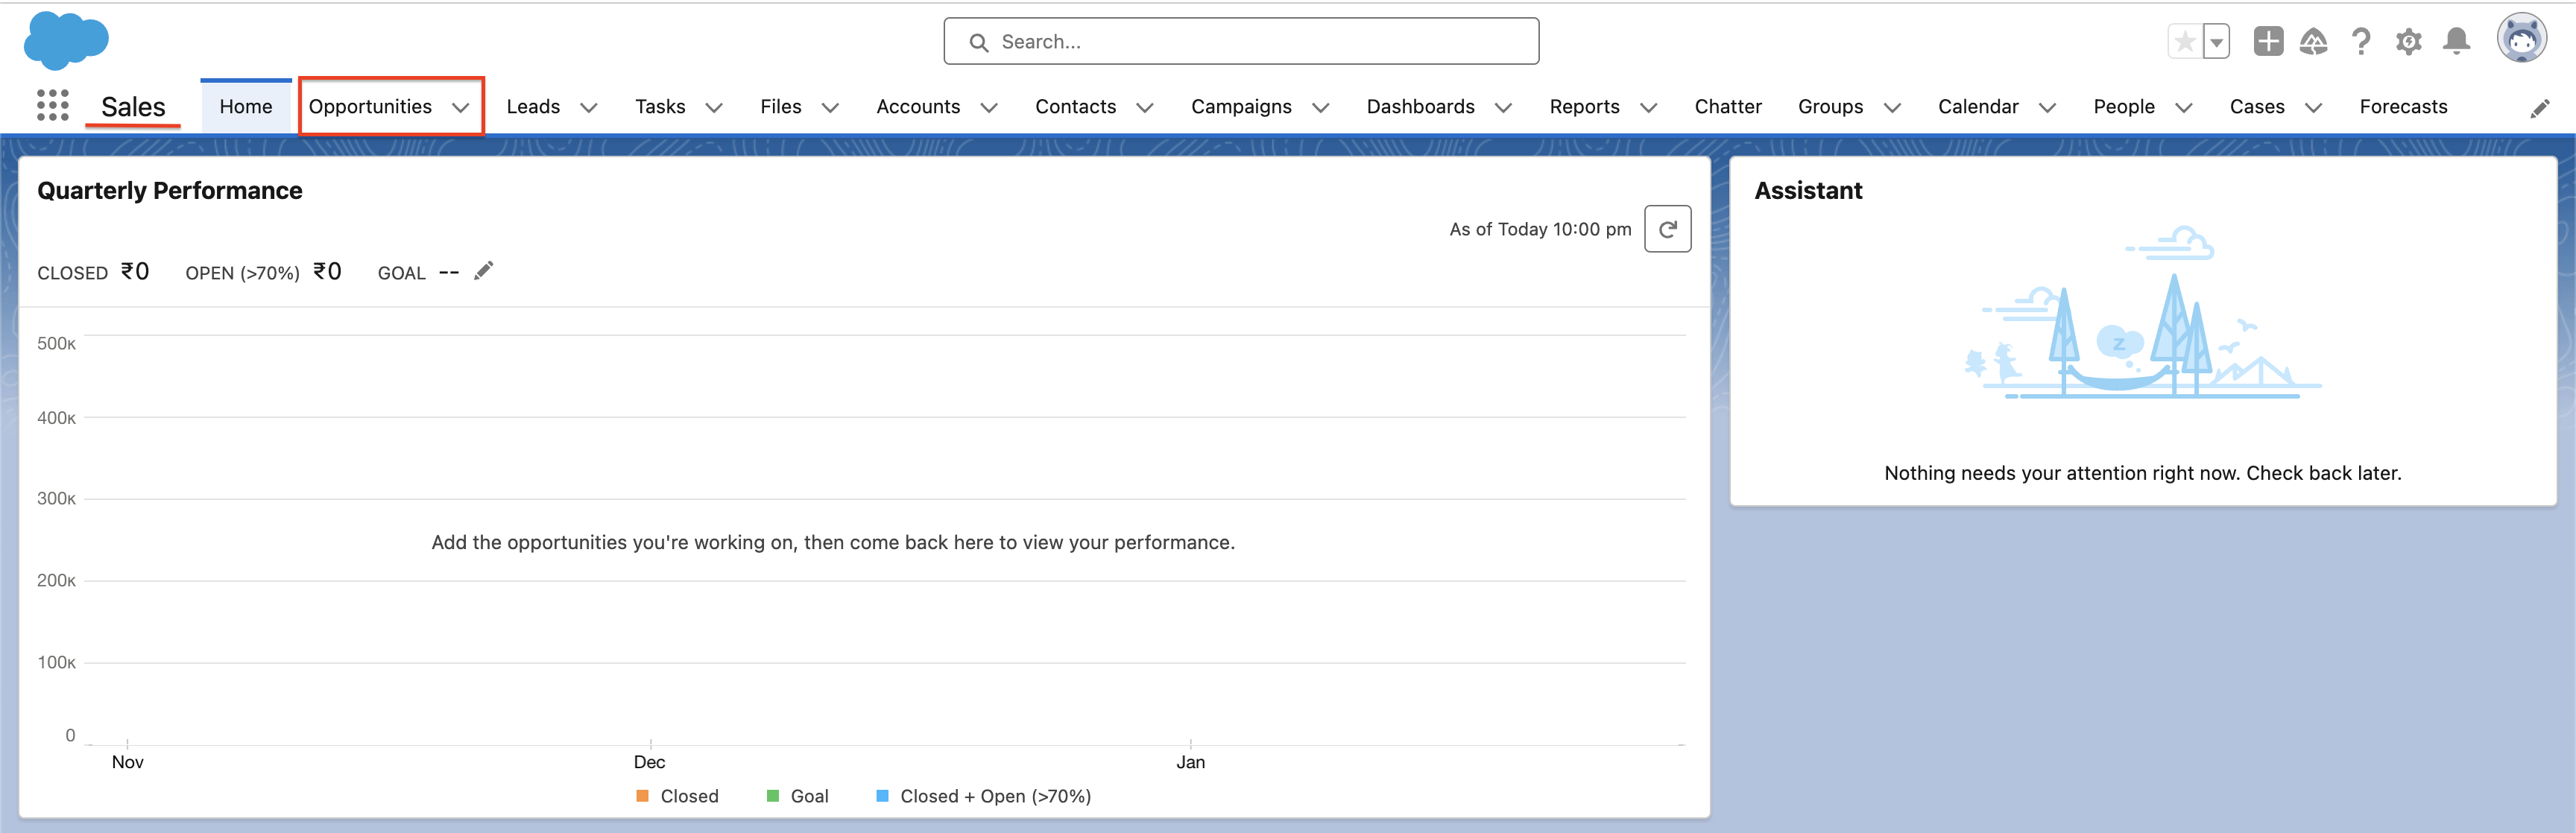
Step 2: Navigate to an Opportunity Record Page and access any available opportunity to view its details.

Step 3: Open the Page Editor
- Click on the top right Gear Icon (⚙) and select Edit Page.
- This action opens the Lightning App Builder for page editing.

Step 4: Drag and Drop the CoSellWidget Component
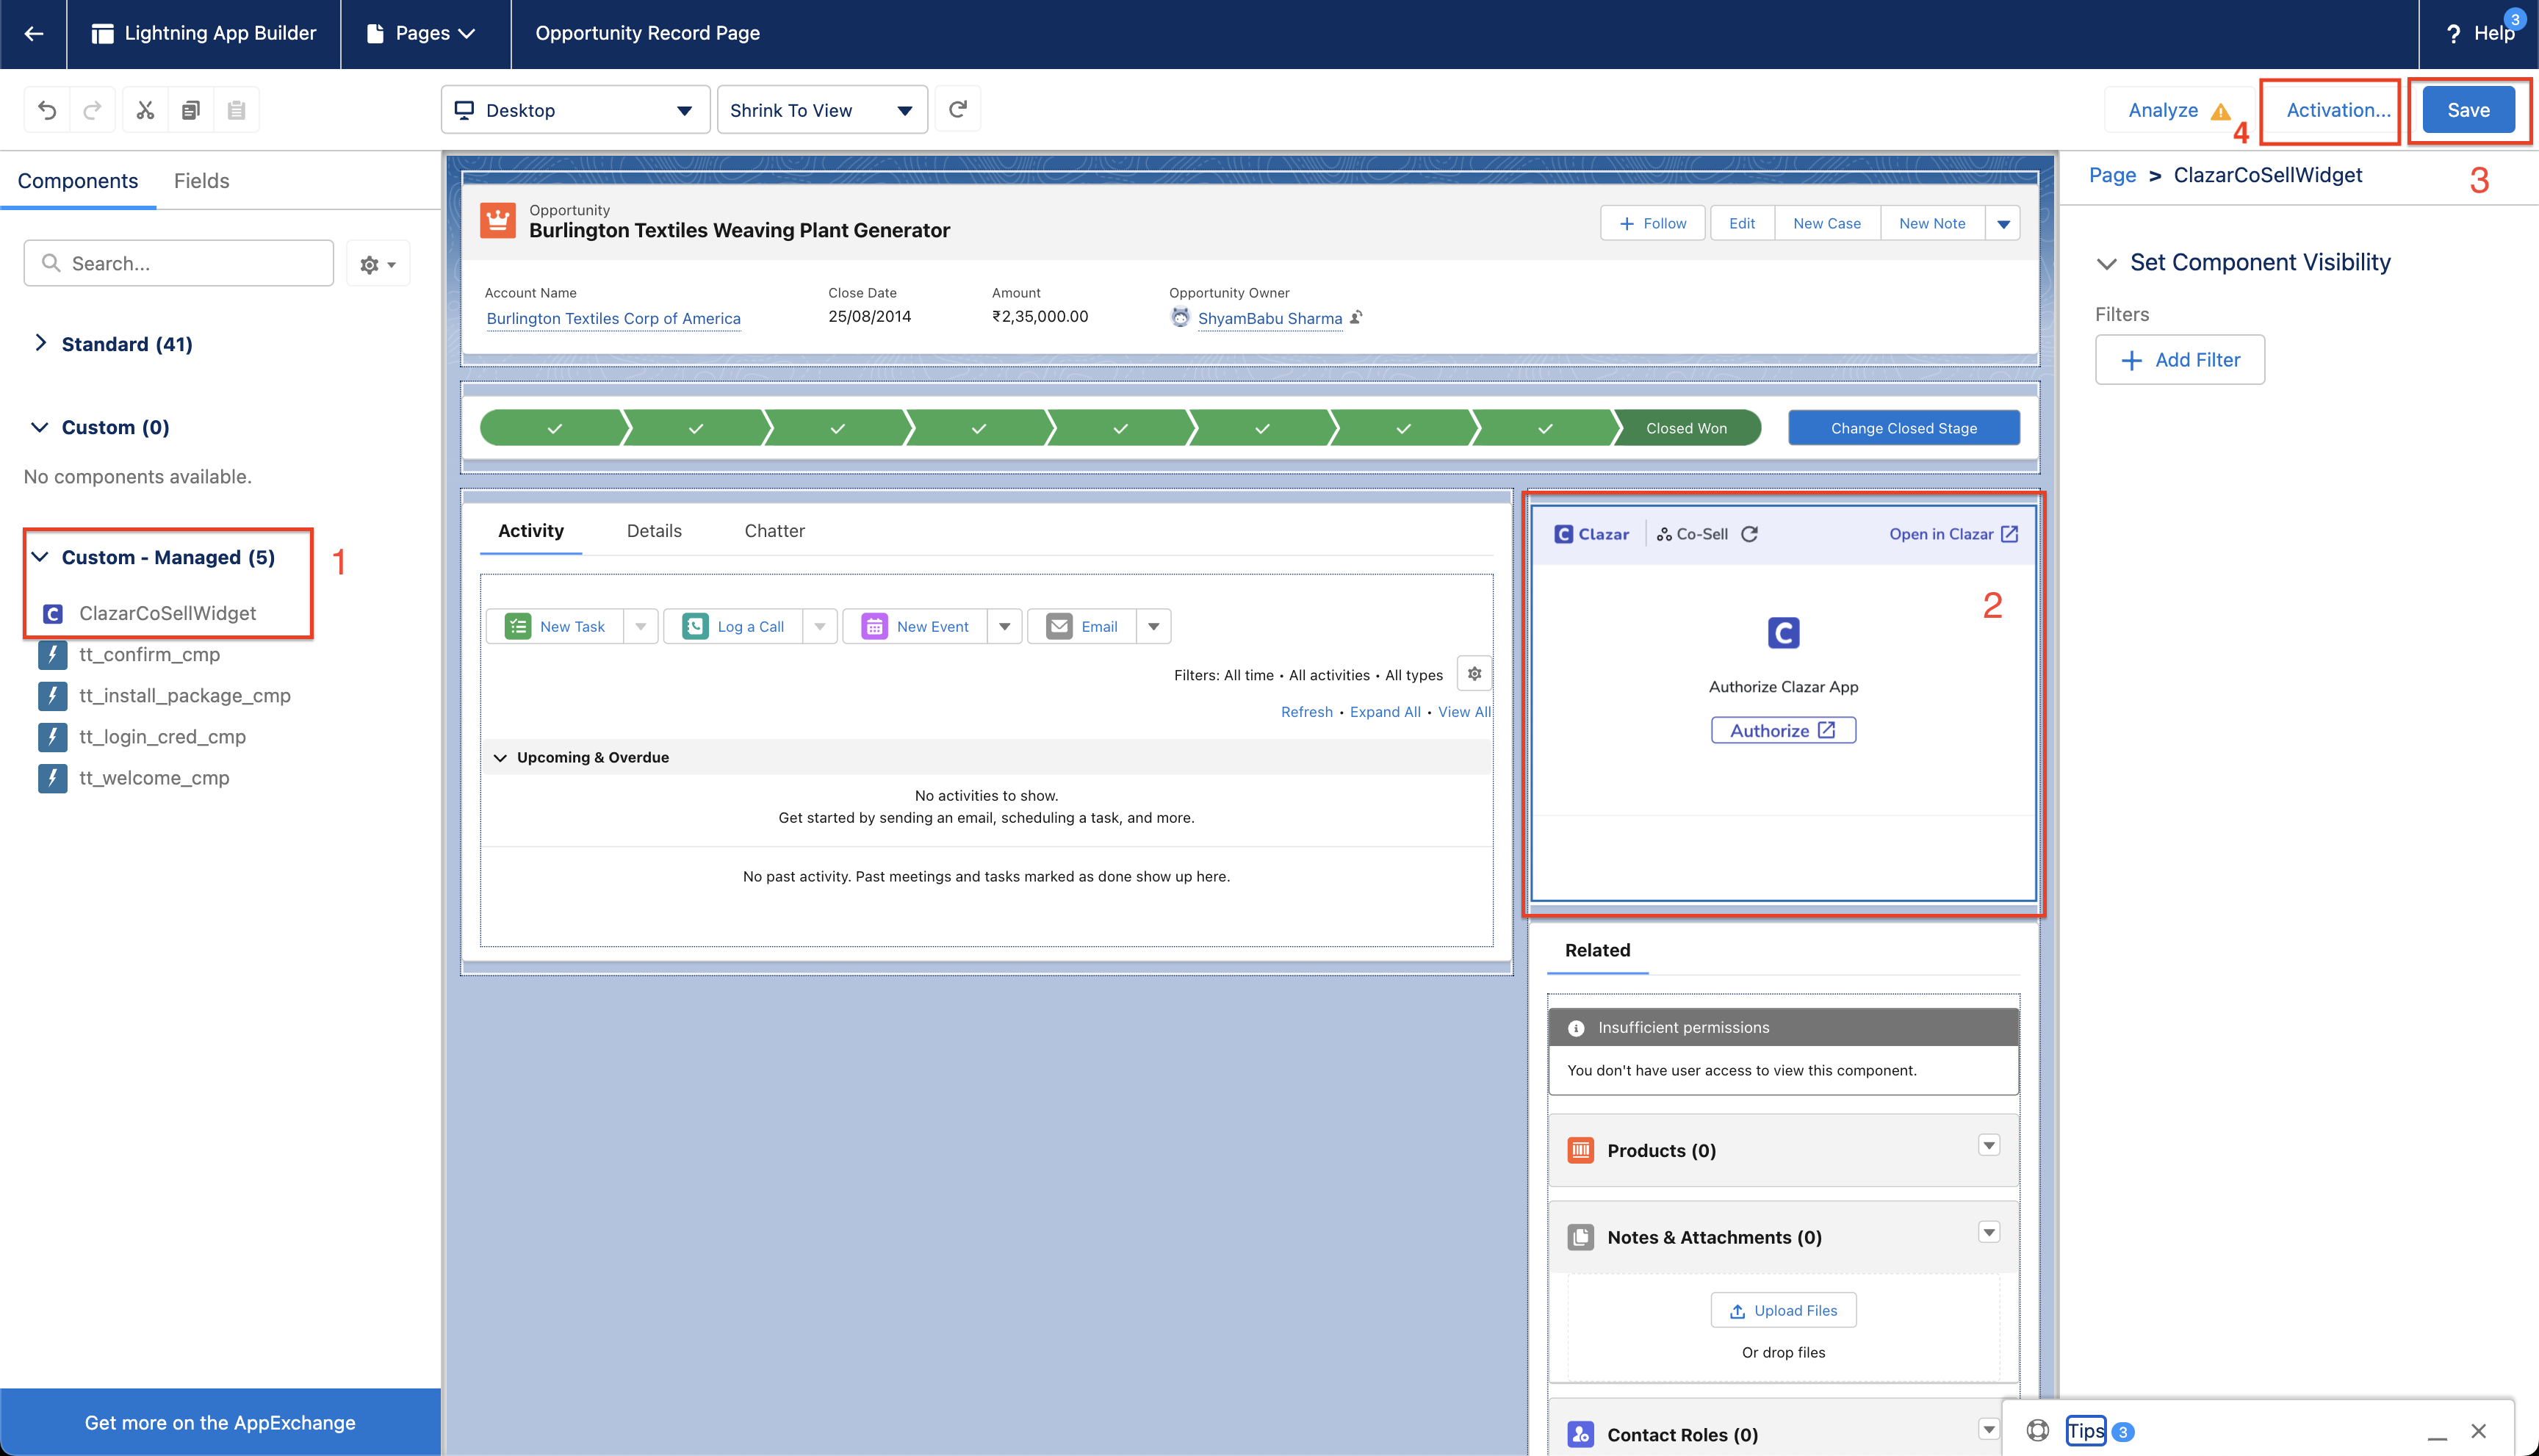
- On the left section inside Components > Custom - Managed, locate ClazarCoSellWidget.
- Simply Drag & Drop the component to the Activity tab on the right side (as shown in the image above).
- Click the Save button to save the layout changes.
- After saving the changes, activate the layout if you are modifying it for the first time.
By following these steps, you can integrate the Co-Sell Widget into the Salesforce Opportunity Record page.
Authorize the Clazar App
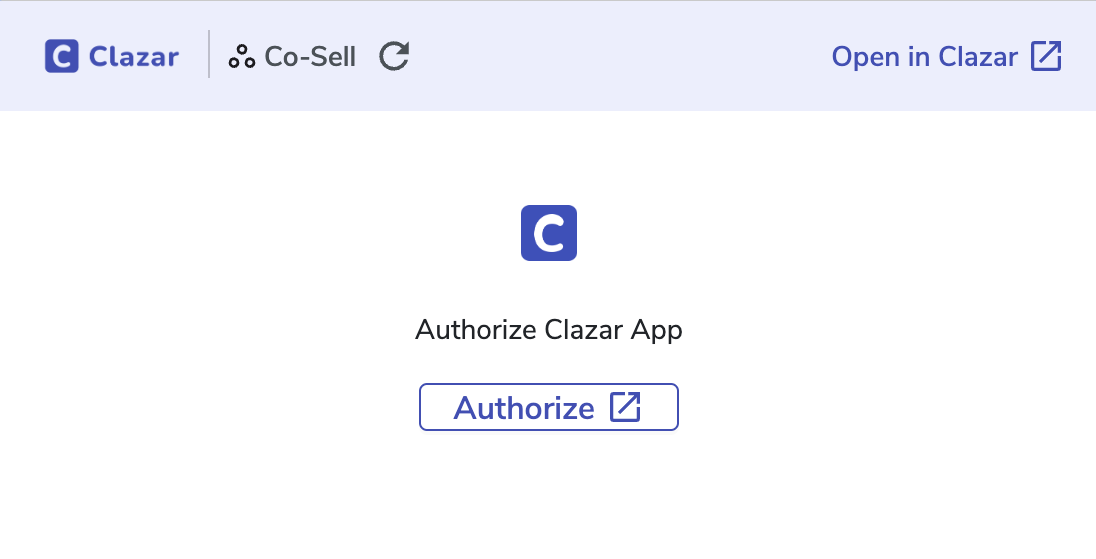
- After adding the ClazarCoSellWidget component to the Opportunity Record page, the app will prompt you to authorize it the first time only.
- Click on the Authorize button. It will open the Allow Access consent pop-up. If the pop-up notification is blocked, make sure to allow it for Salesforce.
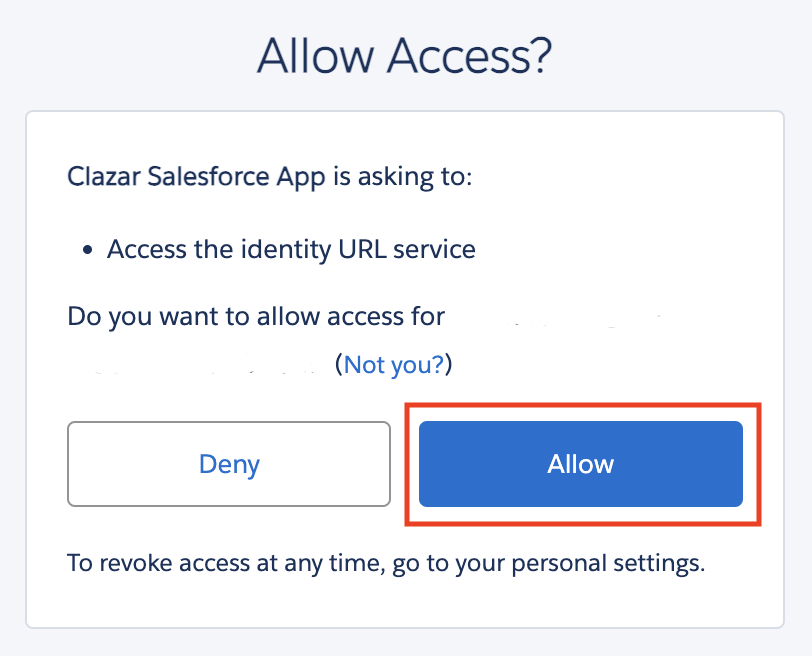
- To grant access to the app, simply click on the Allow button.
- Just to clarify, this is a one-time process required to authorize the application.
Connect Salesforce
- After authorizing the app, you will see "Connect your Salesforce to Clazar". This means that you need to go to the Clazar settings page and connect Salesforce. More details at Connect Salesforce
- If you see "Connect your Salesforce user to Clazar user", it means you have not authorized your Salesforce user to the Clazar platform user. Go to Settings > Profile and Connect to Salesforce
Hurray ✨
Fields Mapping
Sellers can map their Clazar Co-Sell fields to their Salesforce fields. When the fields are linked correctly, they will be automatically populated when creating an opportunity through Salesforce Opportunity.
- Click the Pencil icon for further mapping of individual values on picklist fields.
- Once you have finished mapping all the fields, simply click the Save button to complete the process.
Opportunities Mapping
Sellers can map their existing co-sell opportunities to their Salesforce Opportunities if they have already existing Co-Sell opportunities.
- For convenience, the seller can use the Auto-Fill feature to suggest mapping from Clazar Opportunities to Salesforce Opportunities. The seller can then review and click Save.
Good News!!All these mappings are One-Time setup
Be CarefulAll records will be permanently deleted upon installation on a different Salesforce instance.
Create Co-Sell Opportunity
- Users can create an Opportunity from their Salesforce Opportunity by clicking on the Create button.
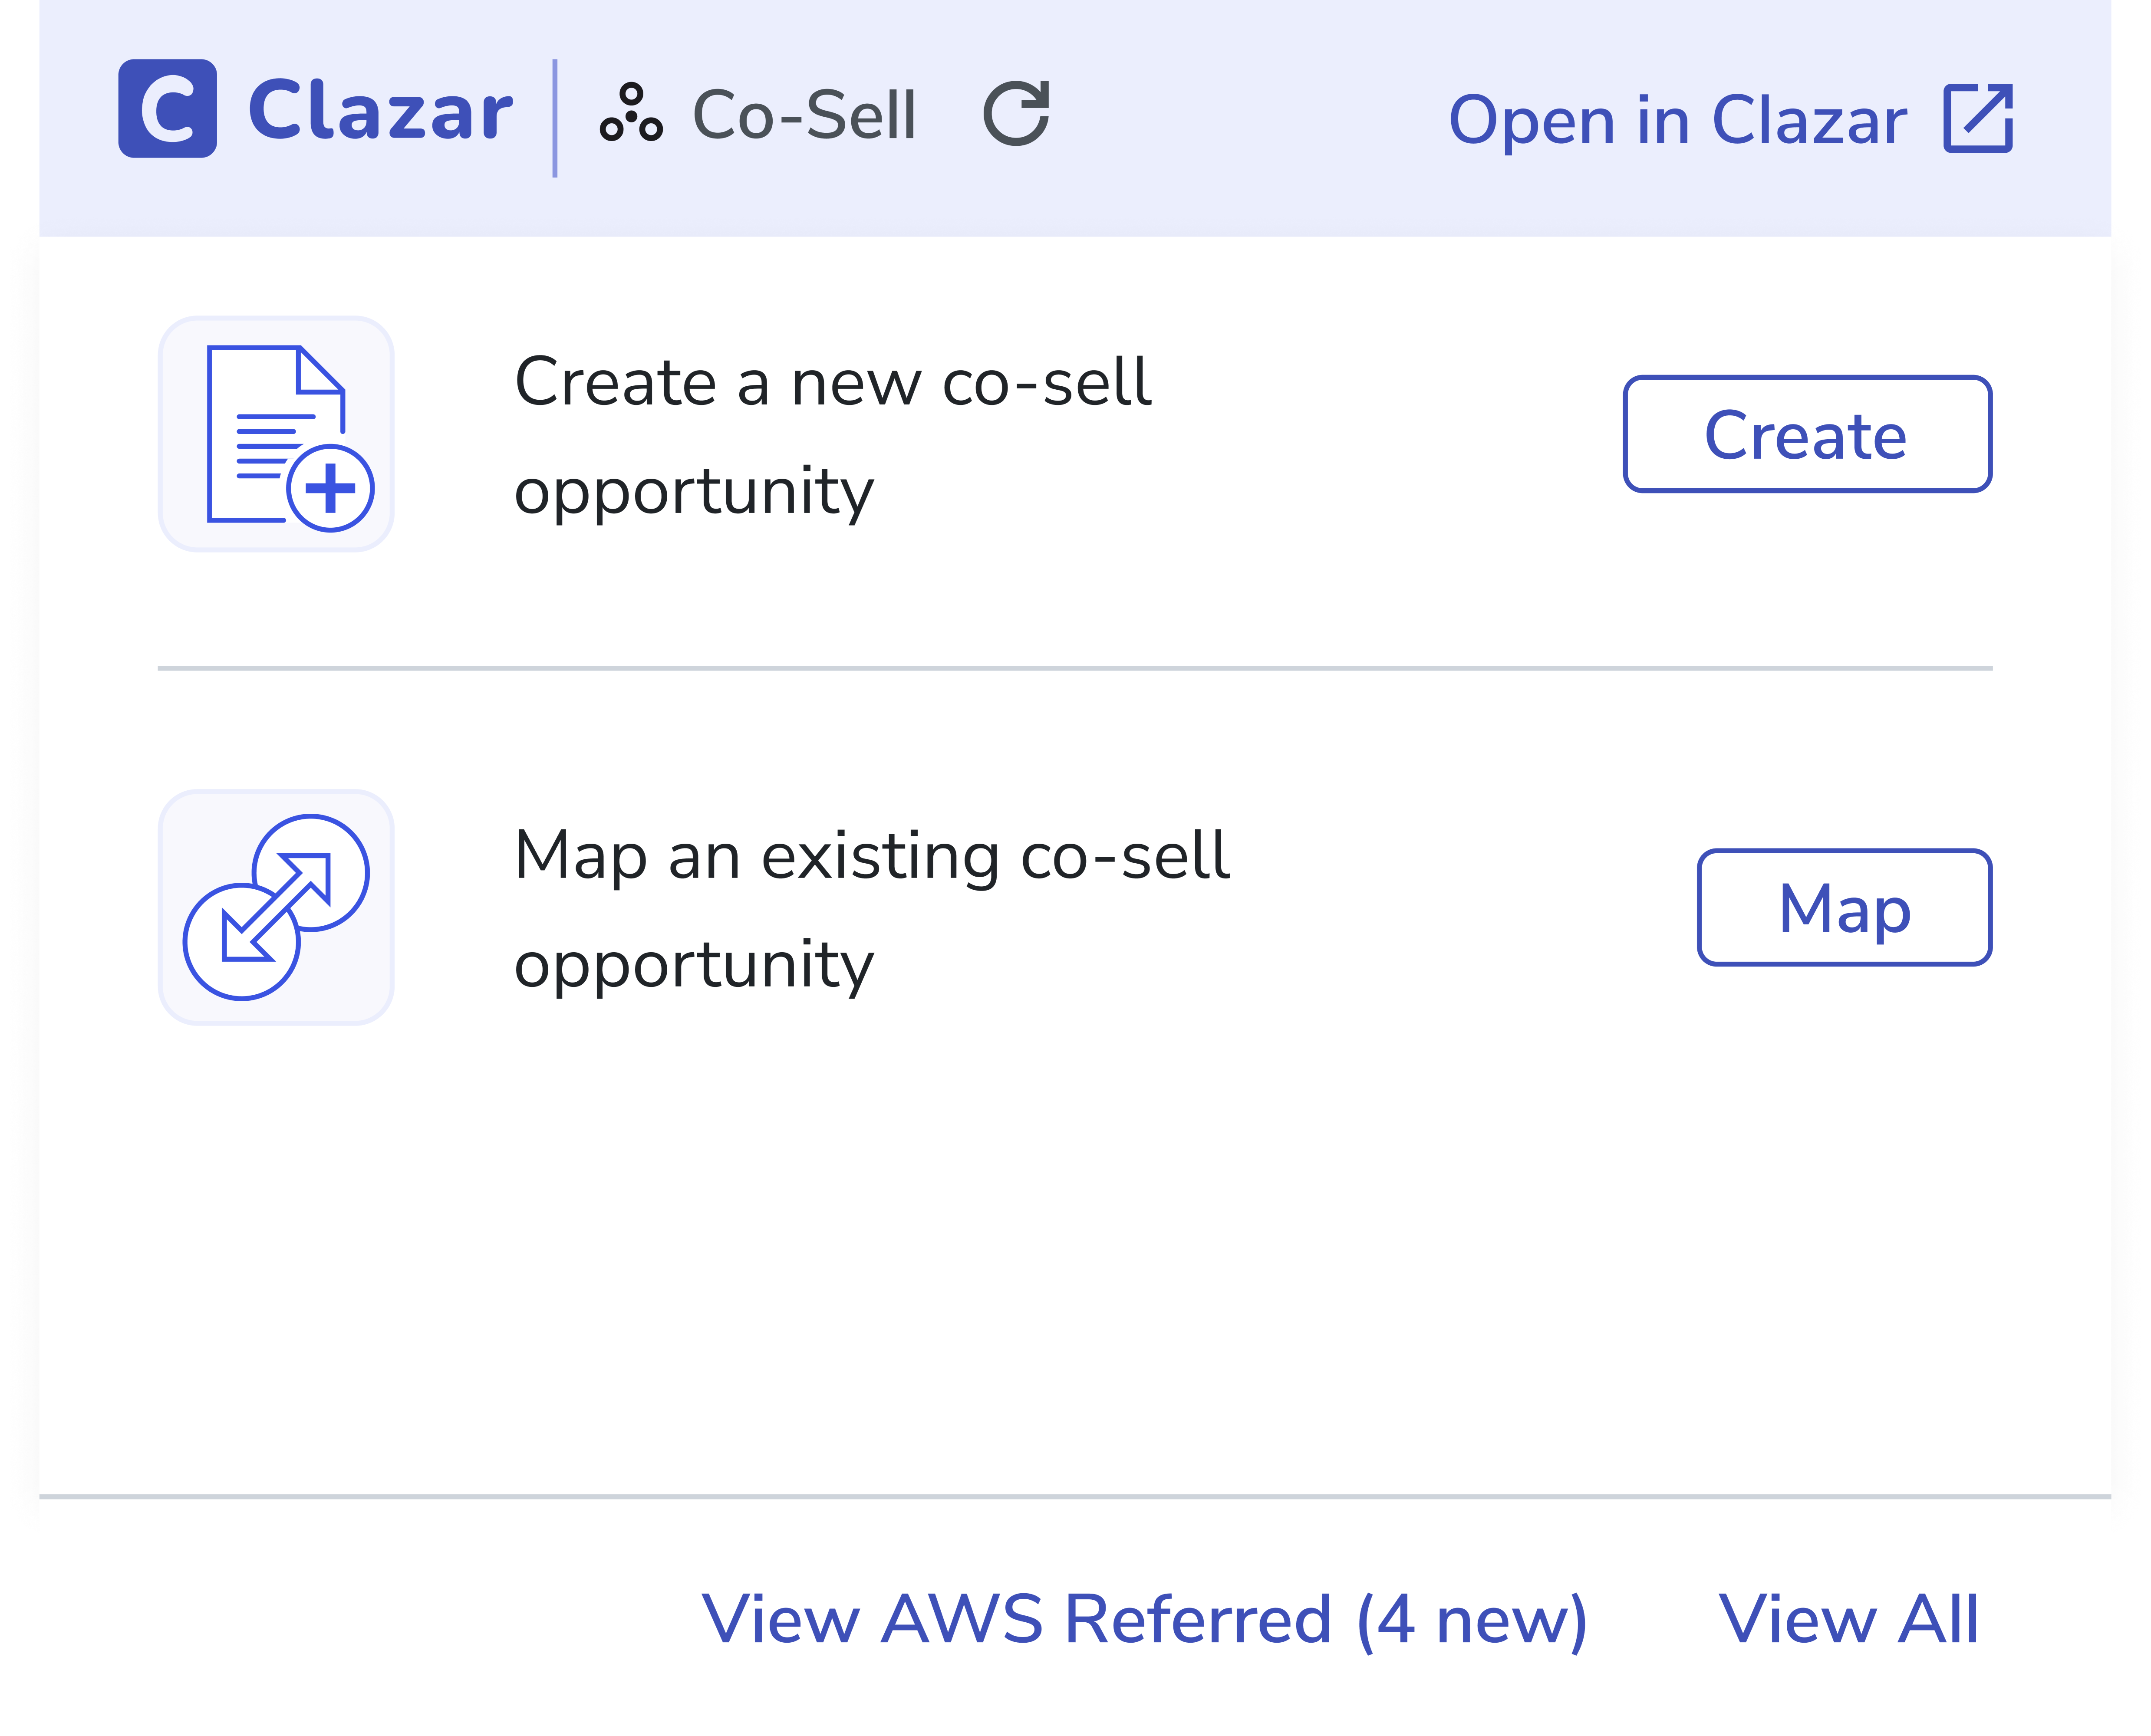
- A modal opens with pre-filled fields based on the field mapping provided.
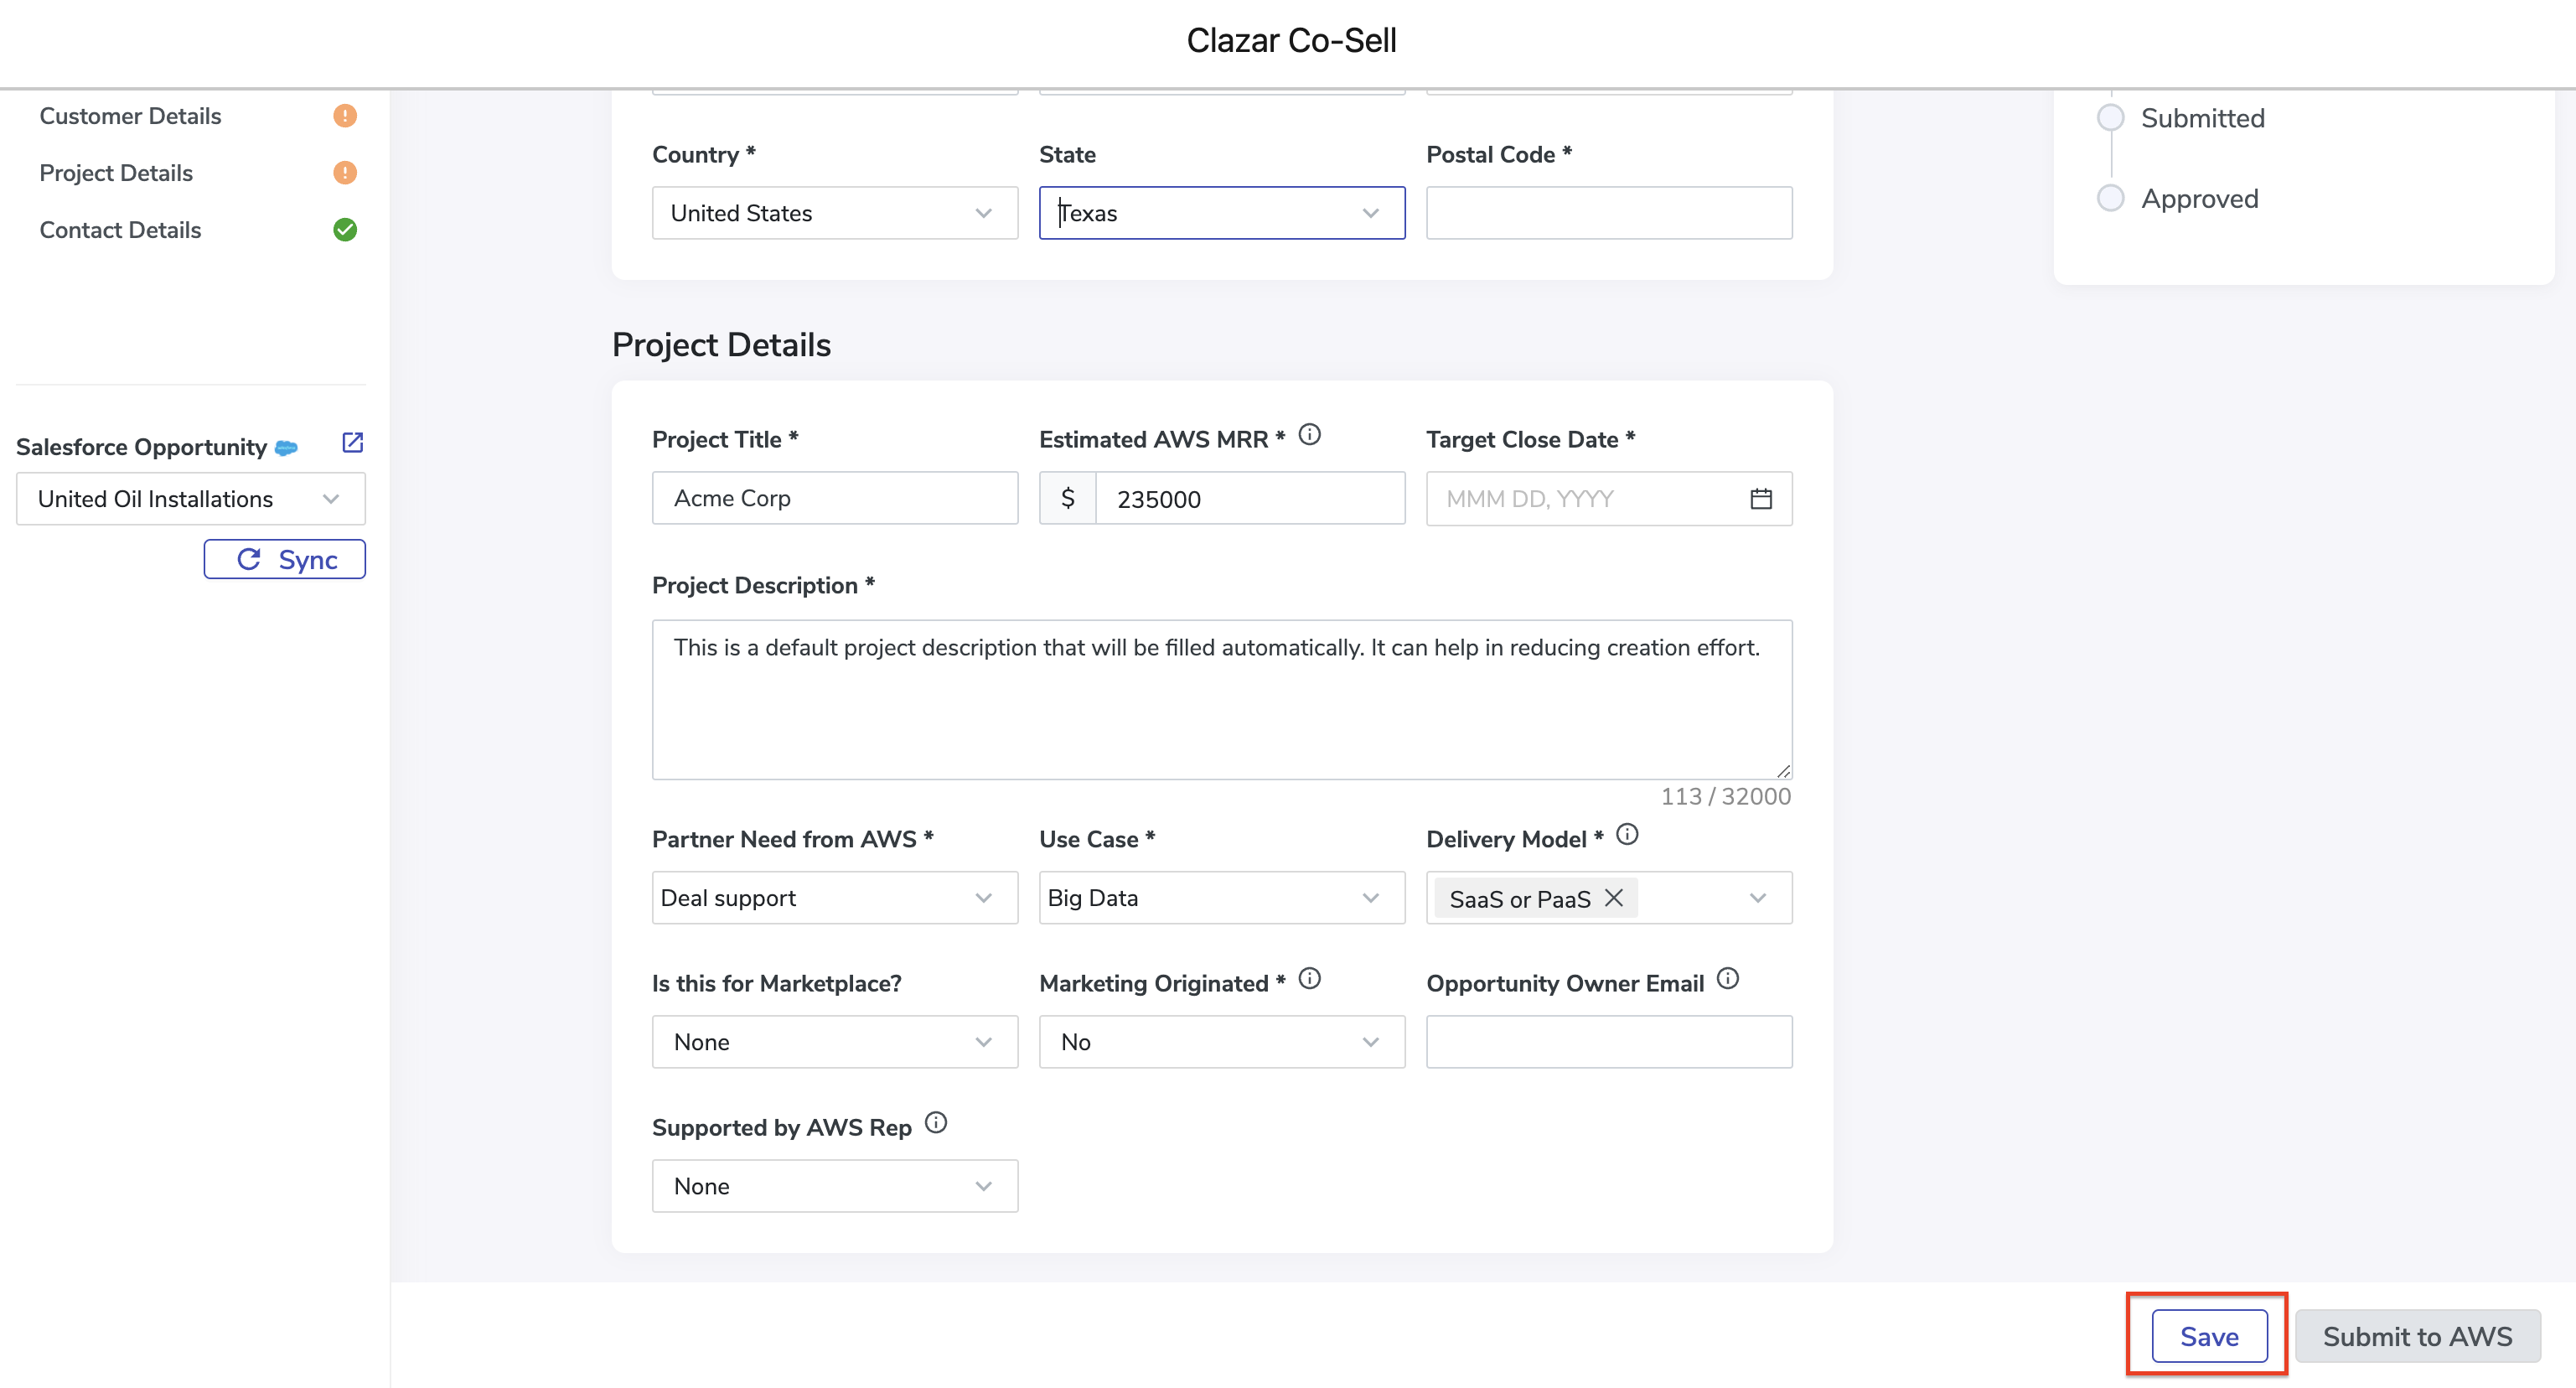
- Review the pre-filled data and click on Save button.
- After saving, users can view the related opportunity in the SideCard under the "Opportunity" section.
Map an existing Co-Sell to Salesforce Opportunity
- Click the Map button to link the Co-Sell Opportunity to Salesforce.
- After clicking the Map button, a modal will appear with all available opportunities.
- Click on any opportunity to view the details and then select the option to map the Salesforce opportunity located on the left-hand side of the screen.

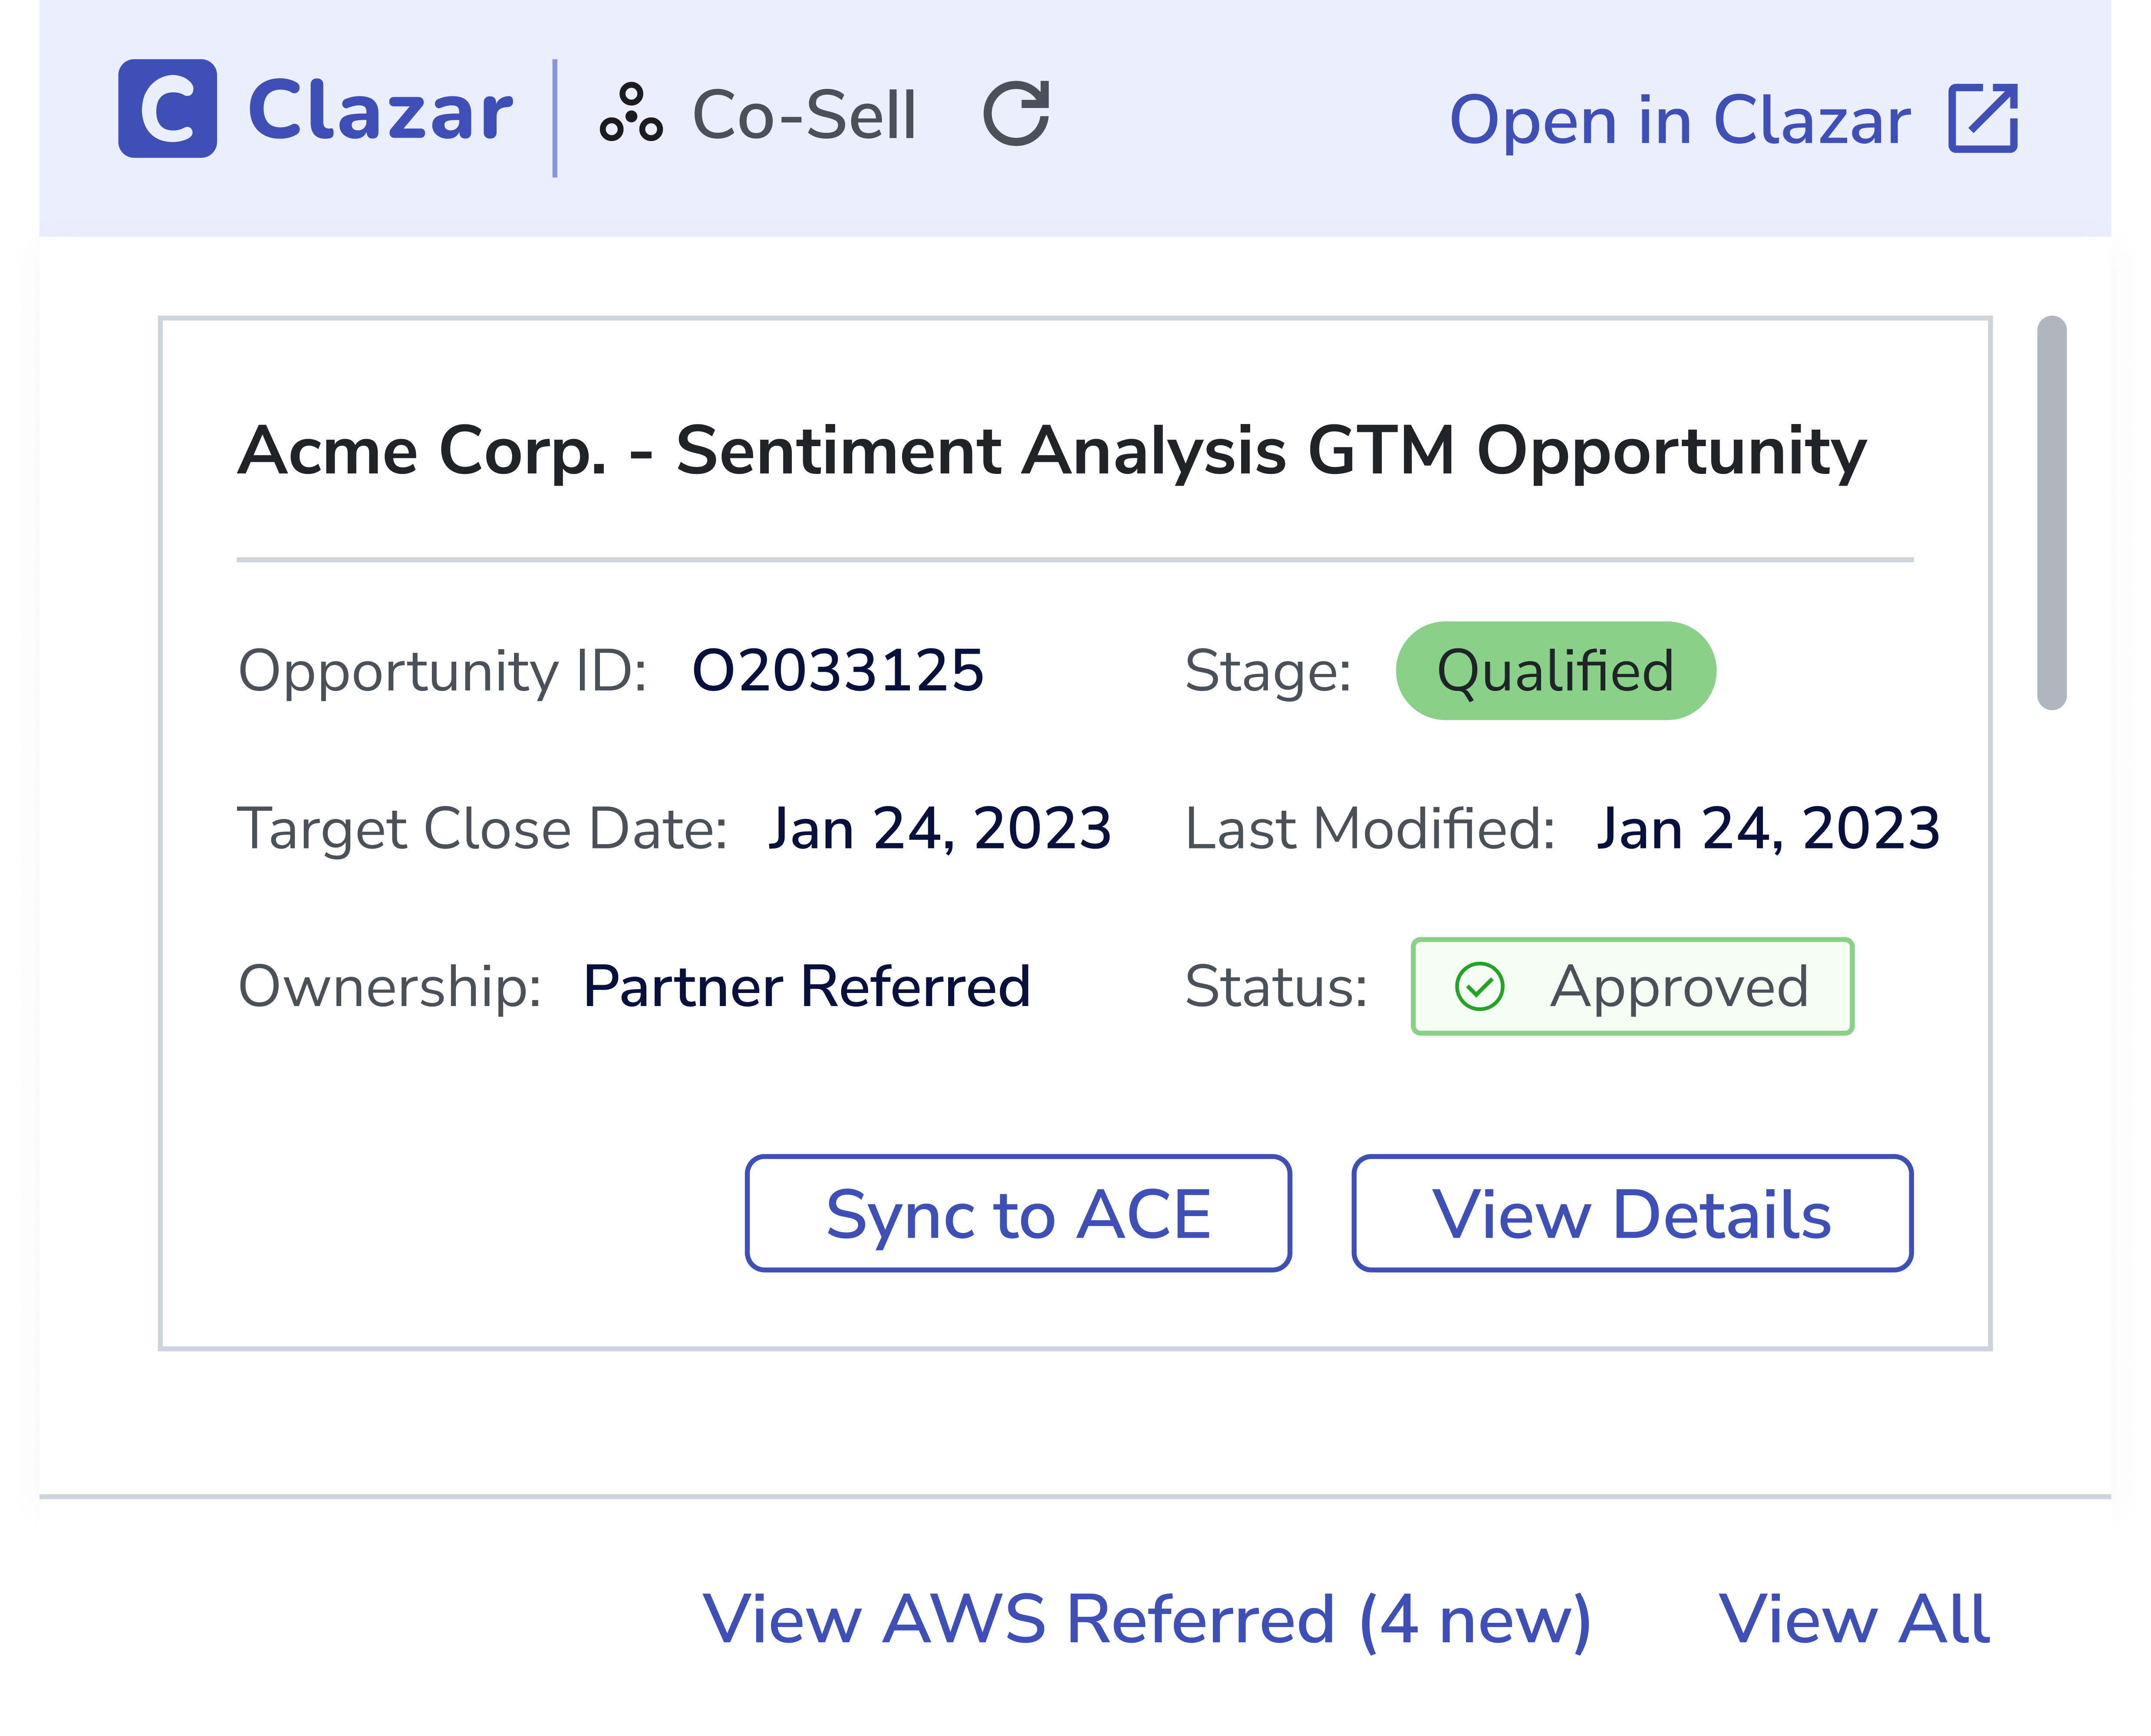
Modify Co-Sell Opportunity
- In addition, you have the ability to modify an opportunity that has already been mapped directly within Salesforce.
- Click on the View Details button to open the details of the record.
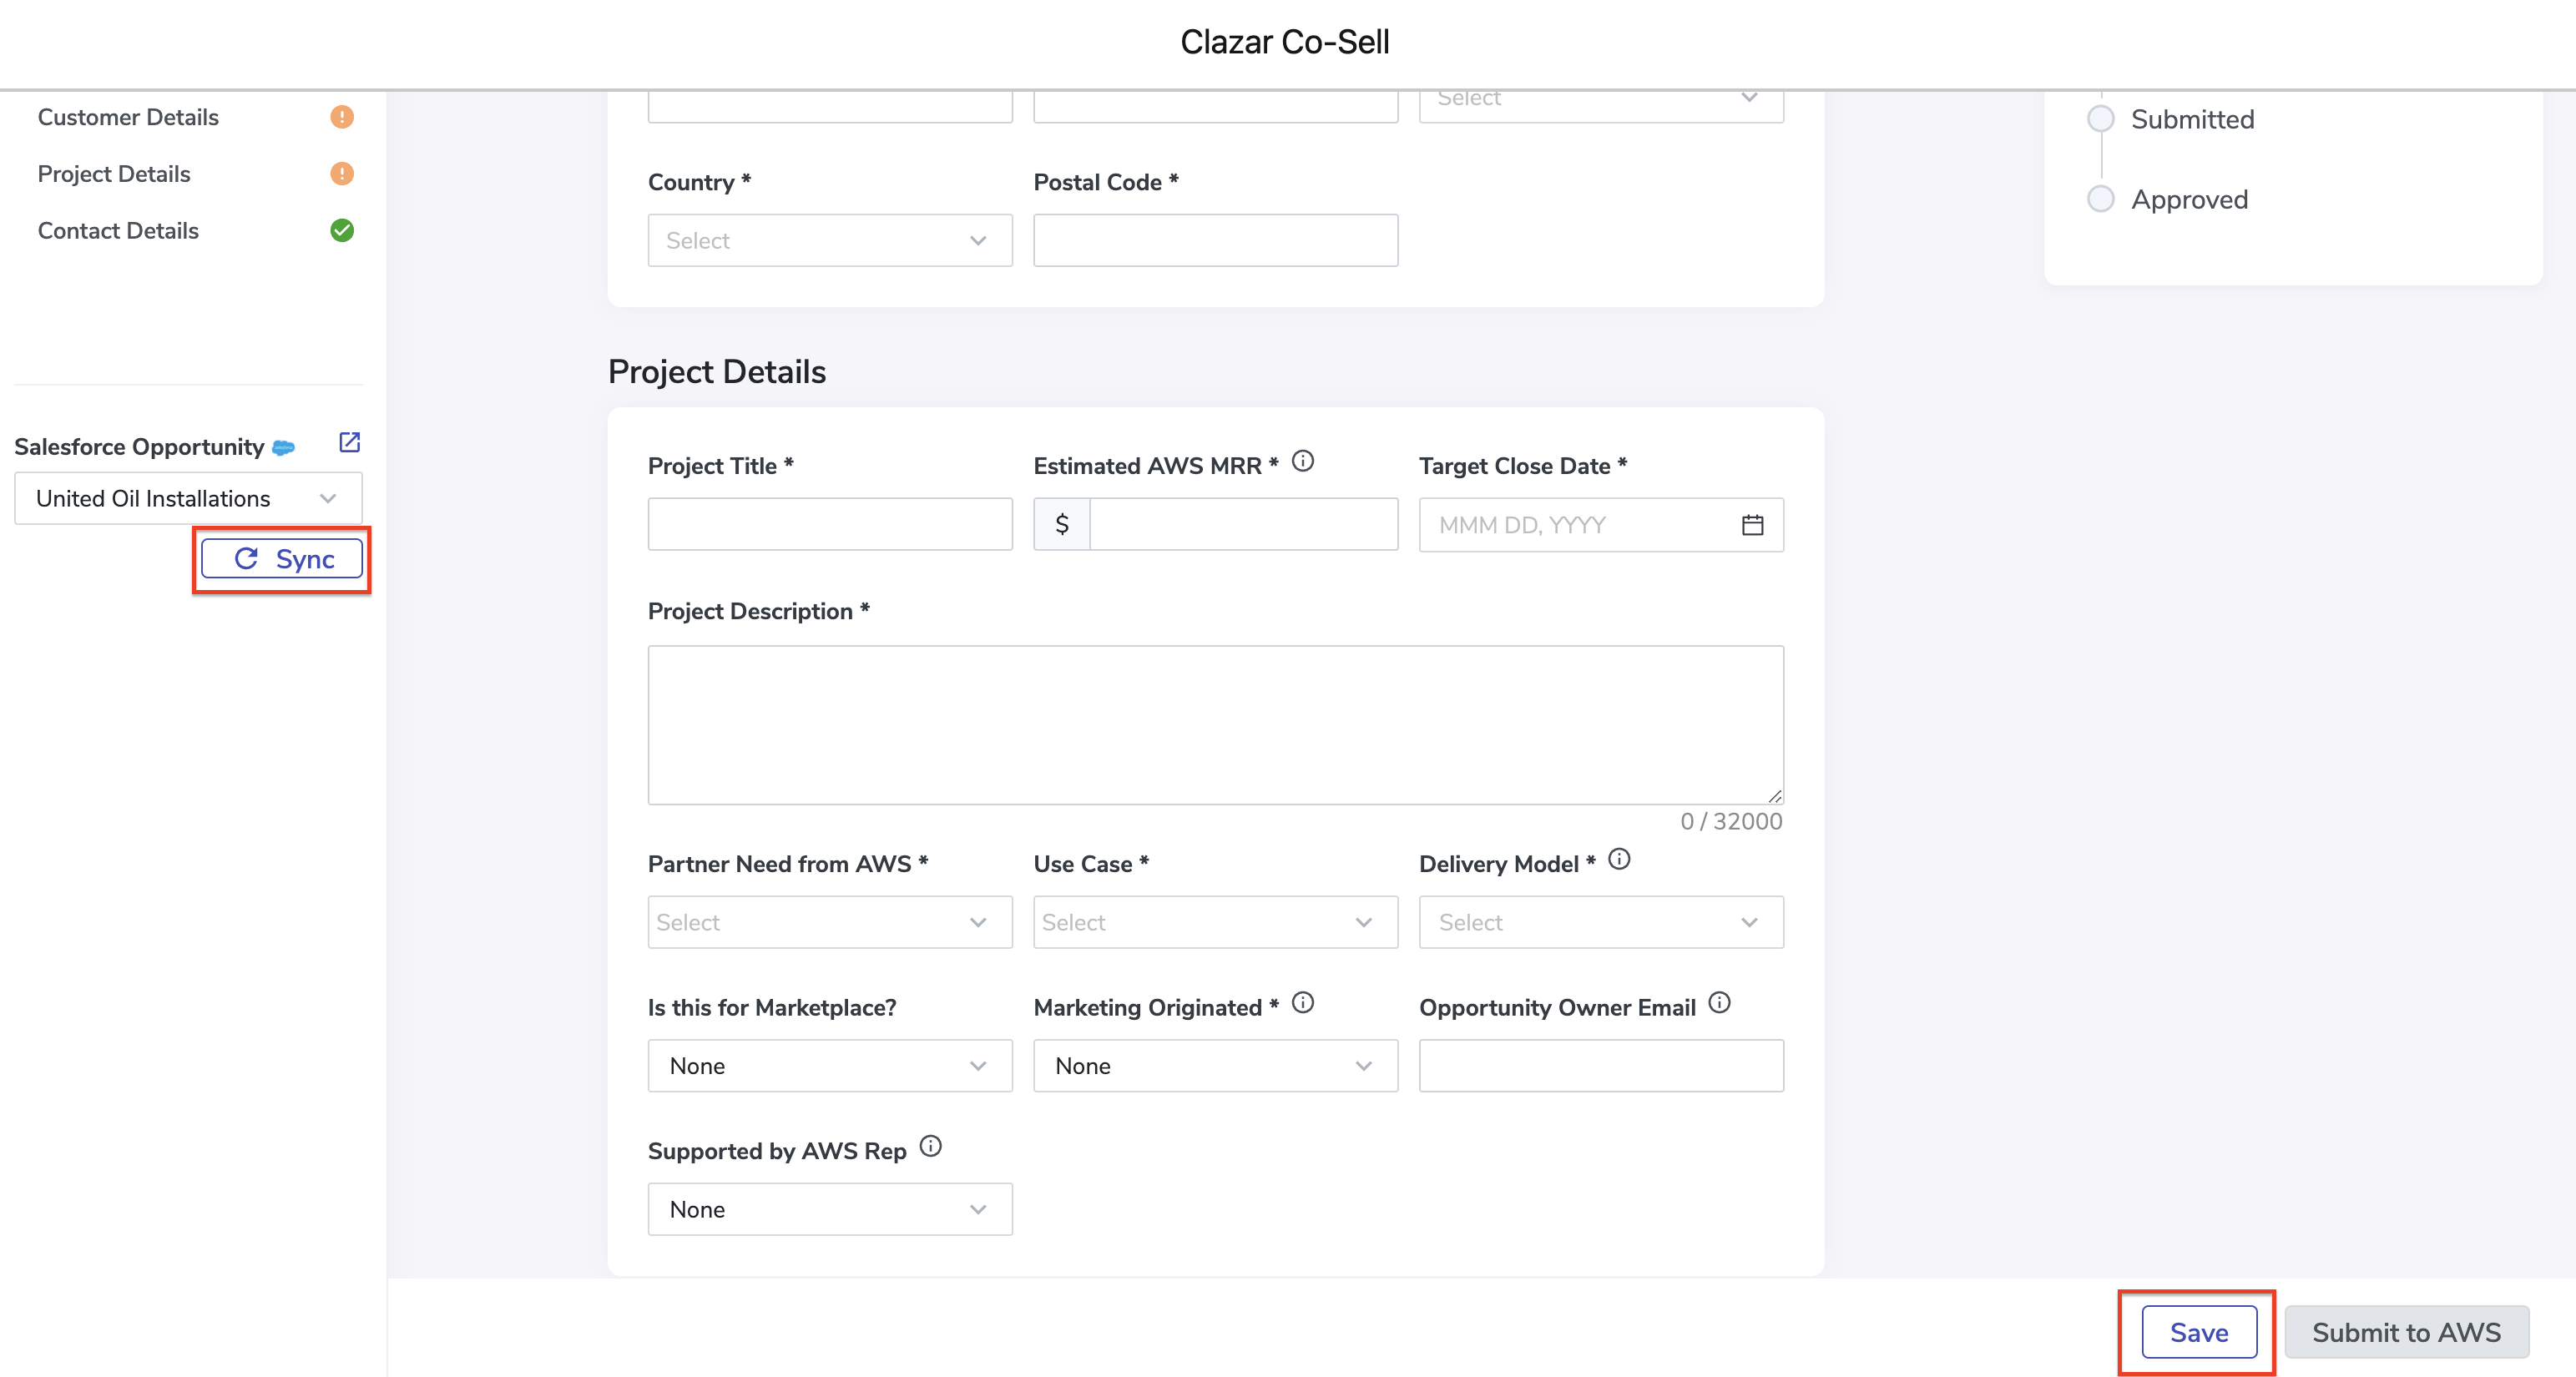
- To complete the details, enter the necessary information and then click on the Save button to save your progress.
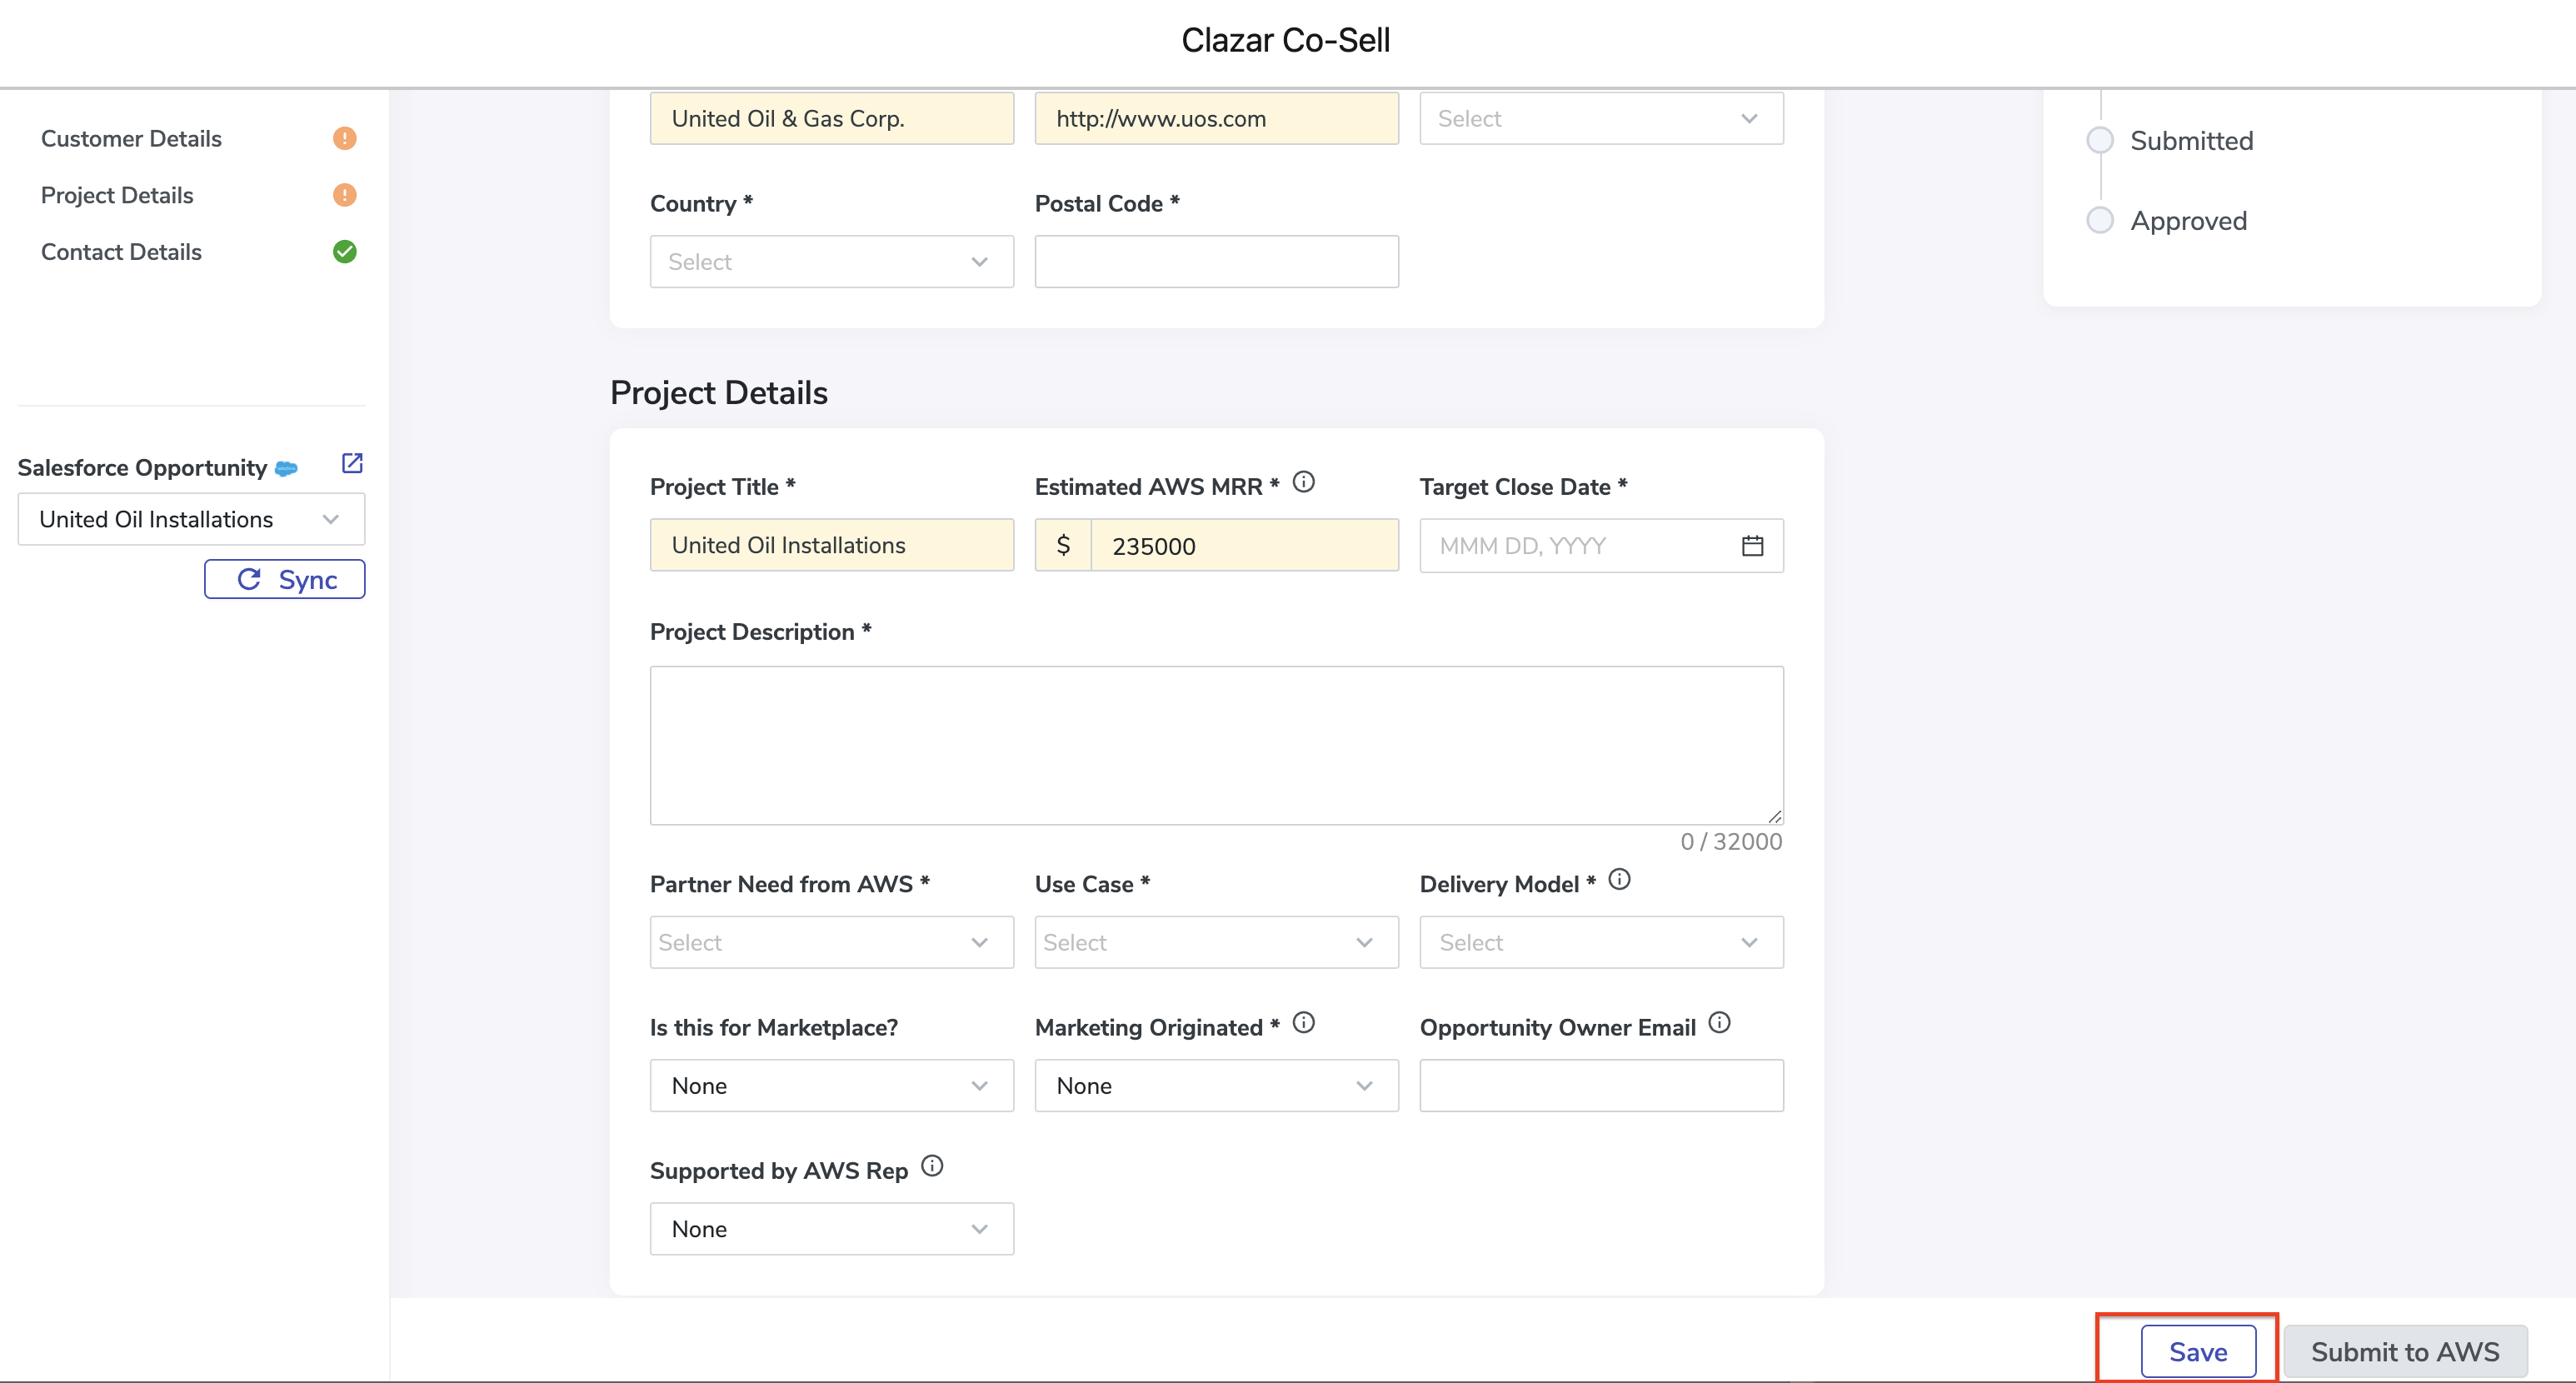
- Using the Sync feature to auto-fill details based on field mapping saves time and allows for review before clicking Save.
- You can also modify the auto-fill values.
Updated 28 days ago