
SCIM User Provisioning
SCIM provisioning allows for the automatic provisioning and deprovisioning of users in your Clazar account when they are provisioned or deprovisioned in the Identity Provider
Prerequisites
- Before enabling SCIM provisioning, ensure that Single Sign-On (SSO) is already configured. If you have not set up SSO yet, refer to the SSO Setup Guide for detailed instructions.

Setup
Clazar Dashboard
-
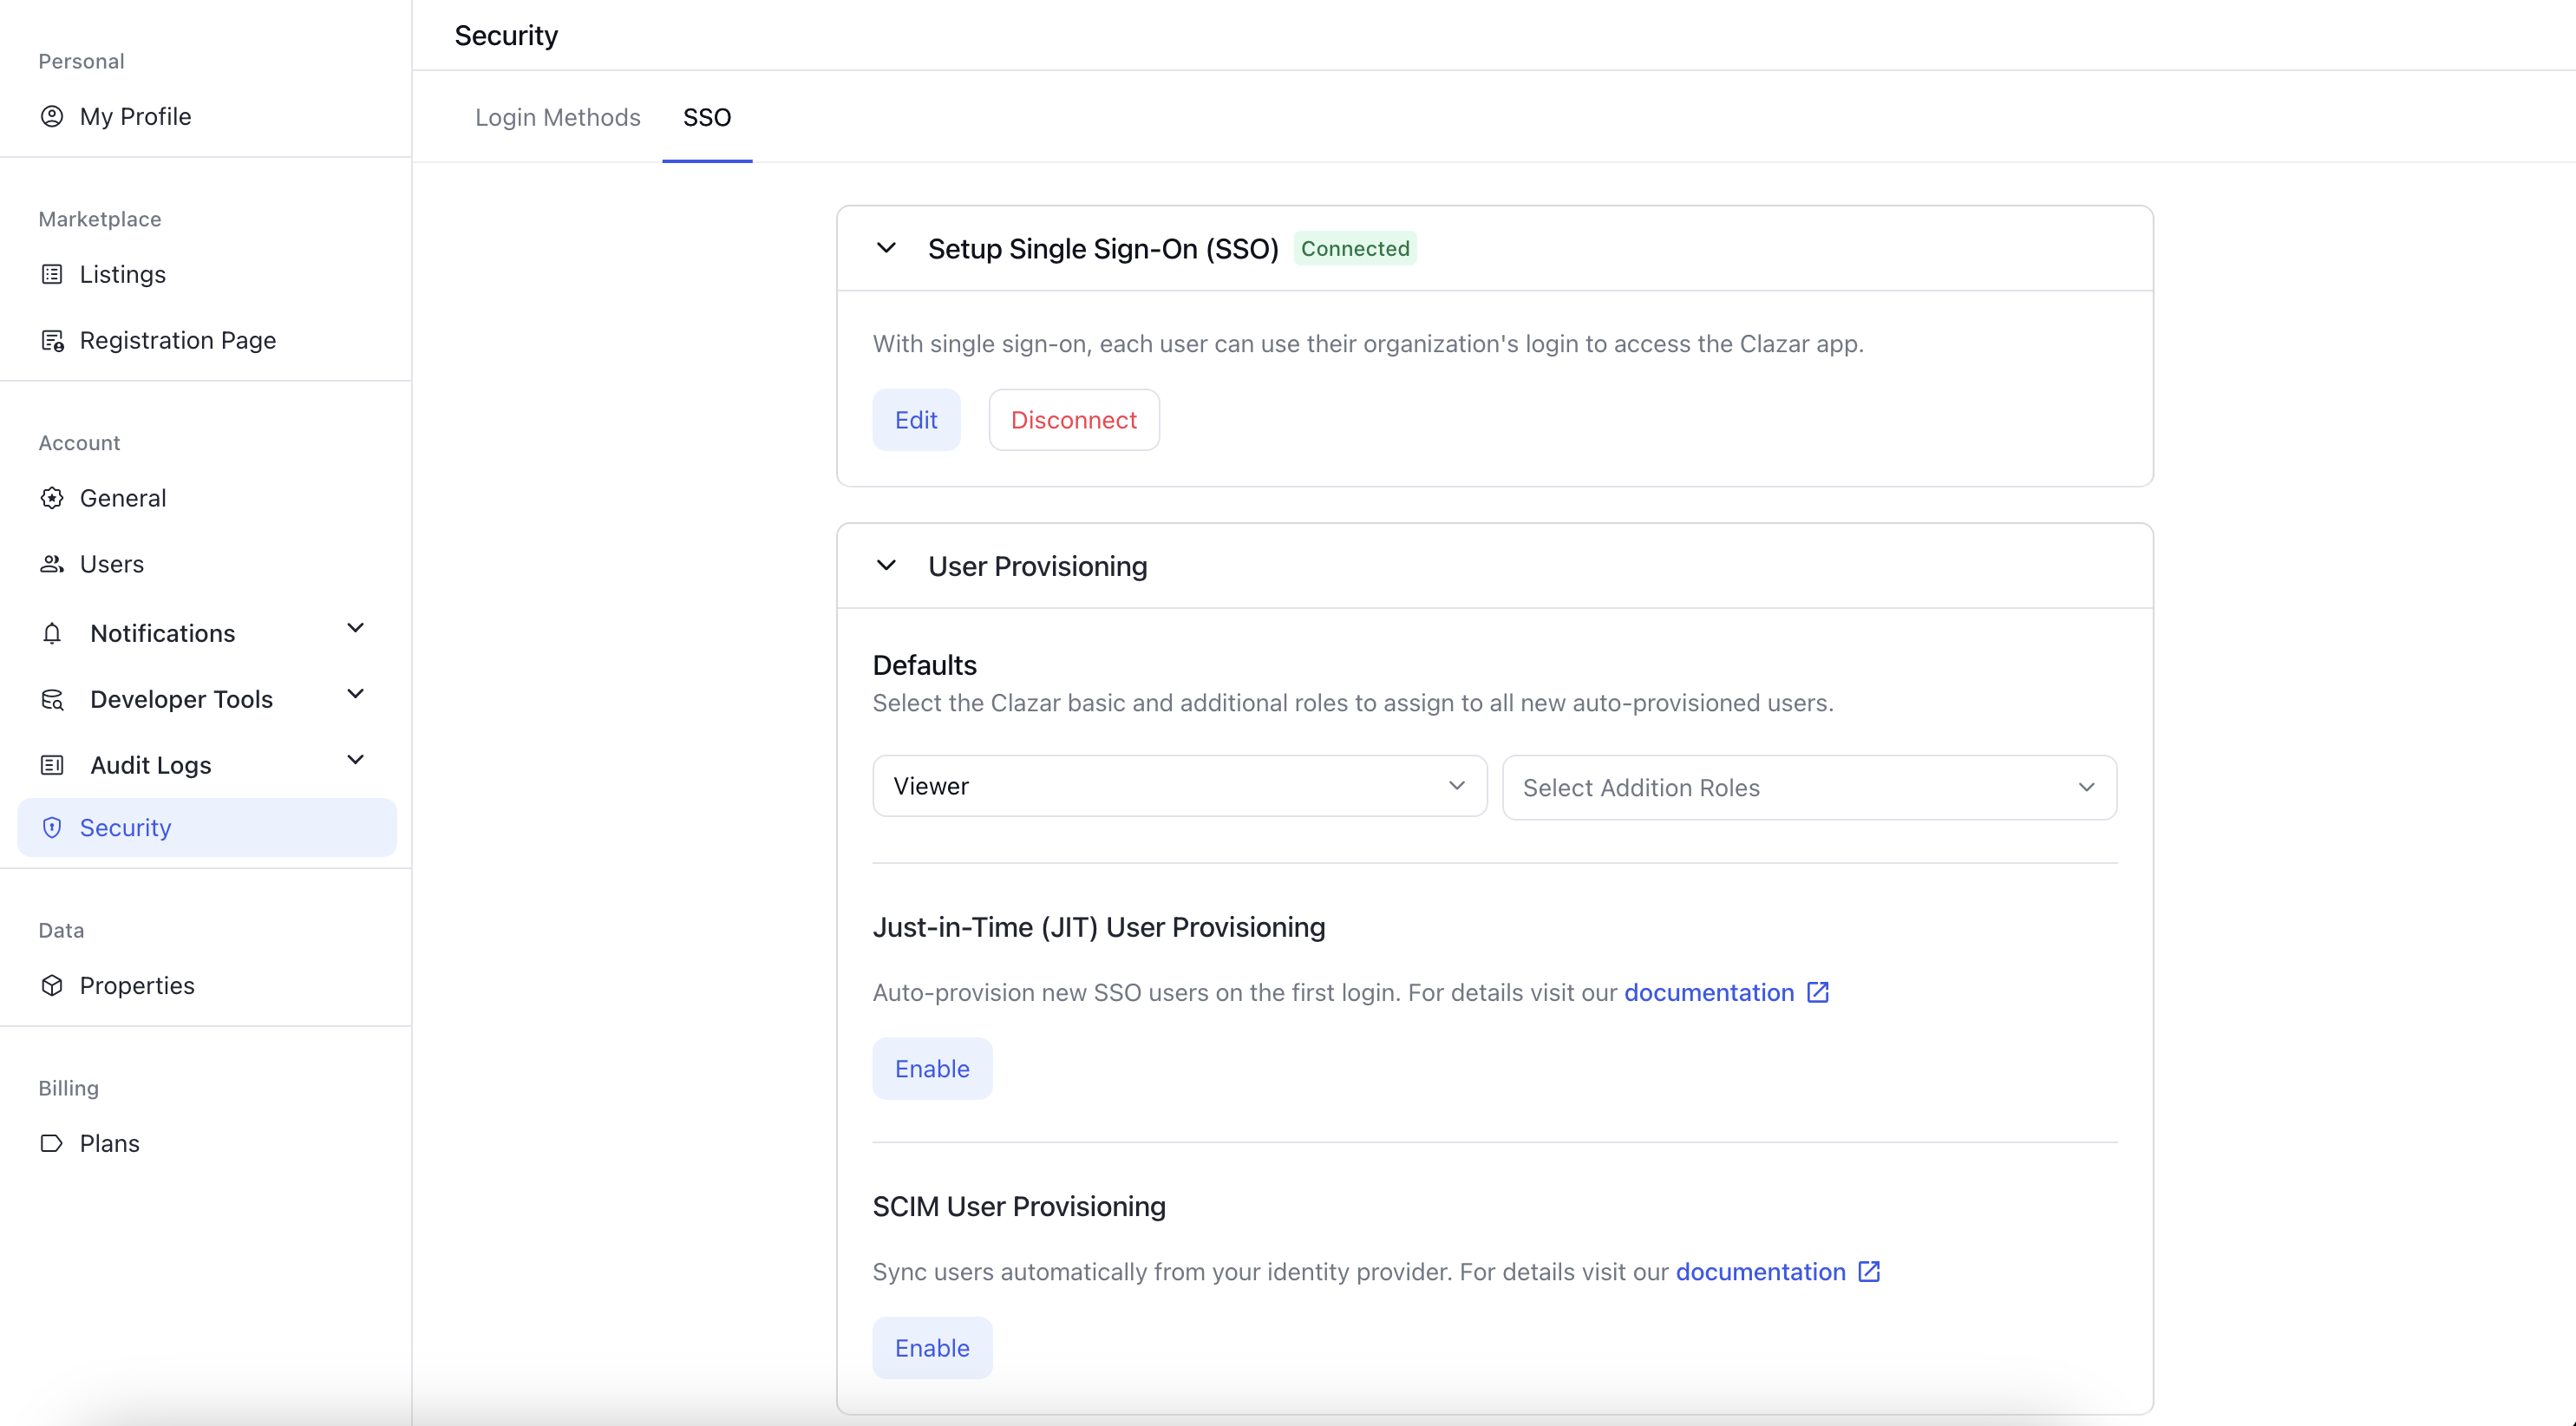
Go to Settings > Security > SSO in your Clazar dashboard
-
Select the default roles that will automatically be assigned to newly provisioned users.
-
Enable SCIM User Provisioning.
-
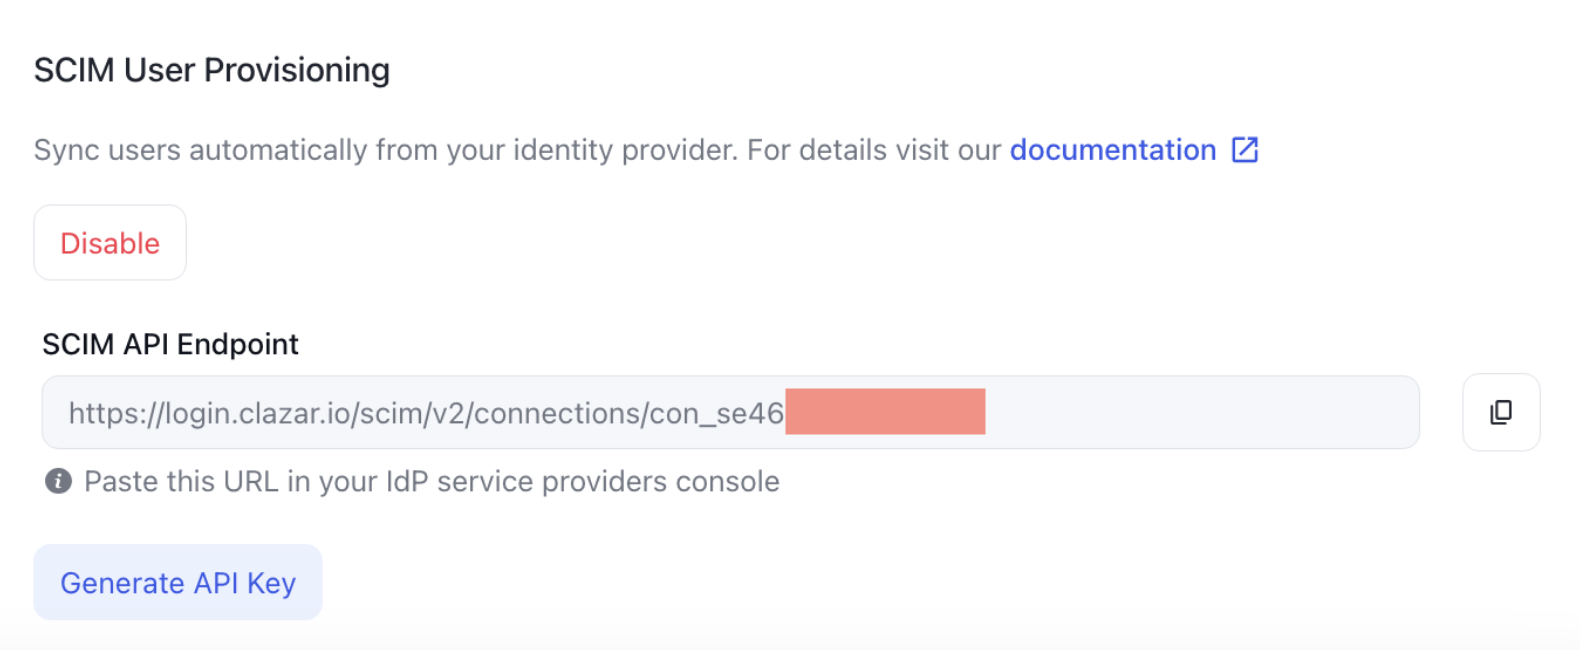
After enabling SCIM, you will see the SCIM API endpoint and an option to Generate API Key.
-
Copy the SCIM API endpoint and API key—you will need these in the next step.
Okta Setup
Step 1
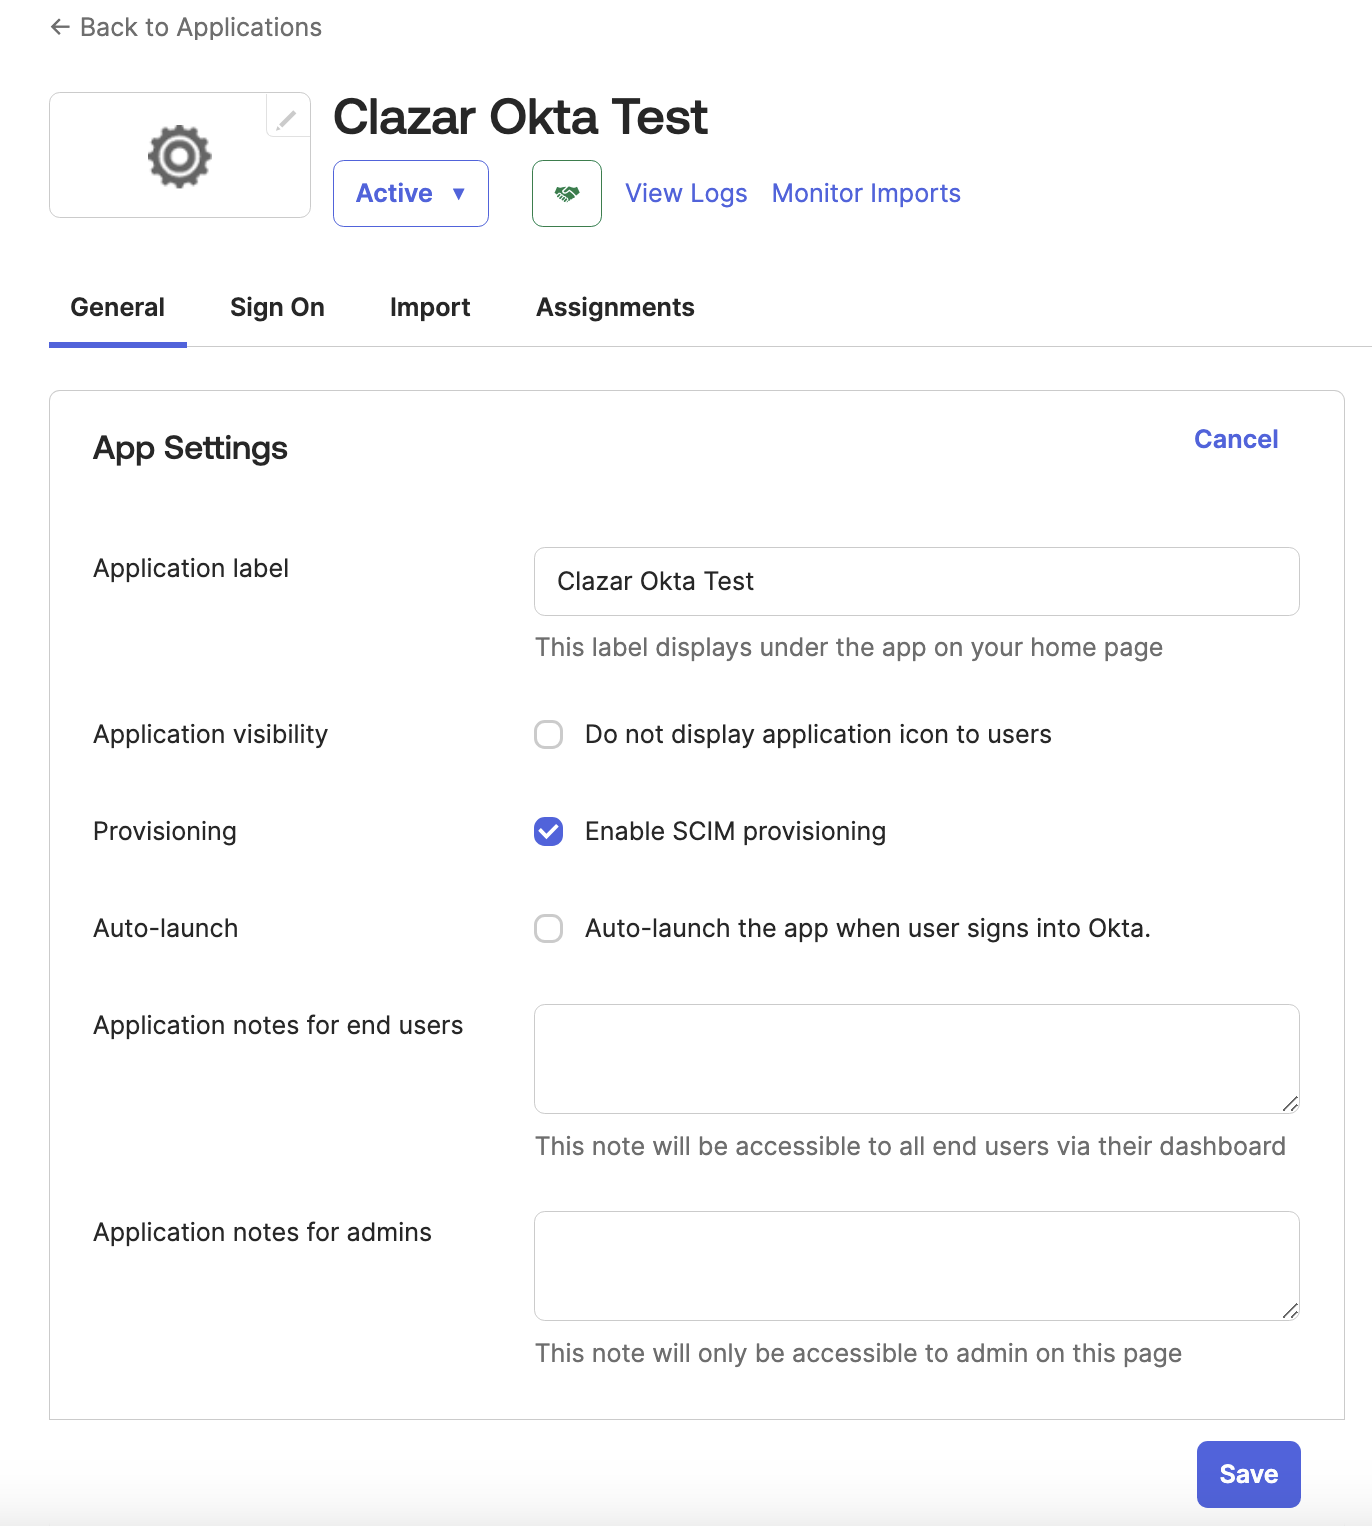
- Open the Clazar app you created as part of the SSO setup in your Okta dashboard.
- In the
Generaltab, enableSCIM Provisioningand then click Save. - The
Provisioningtab should now be visible.

Step 2
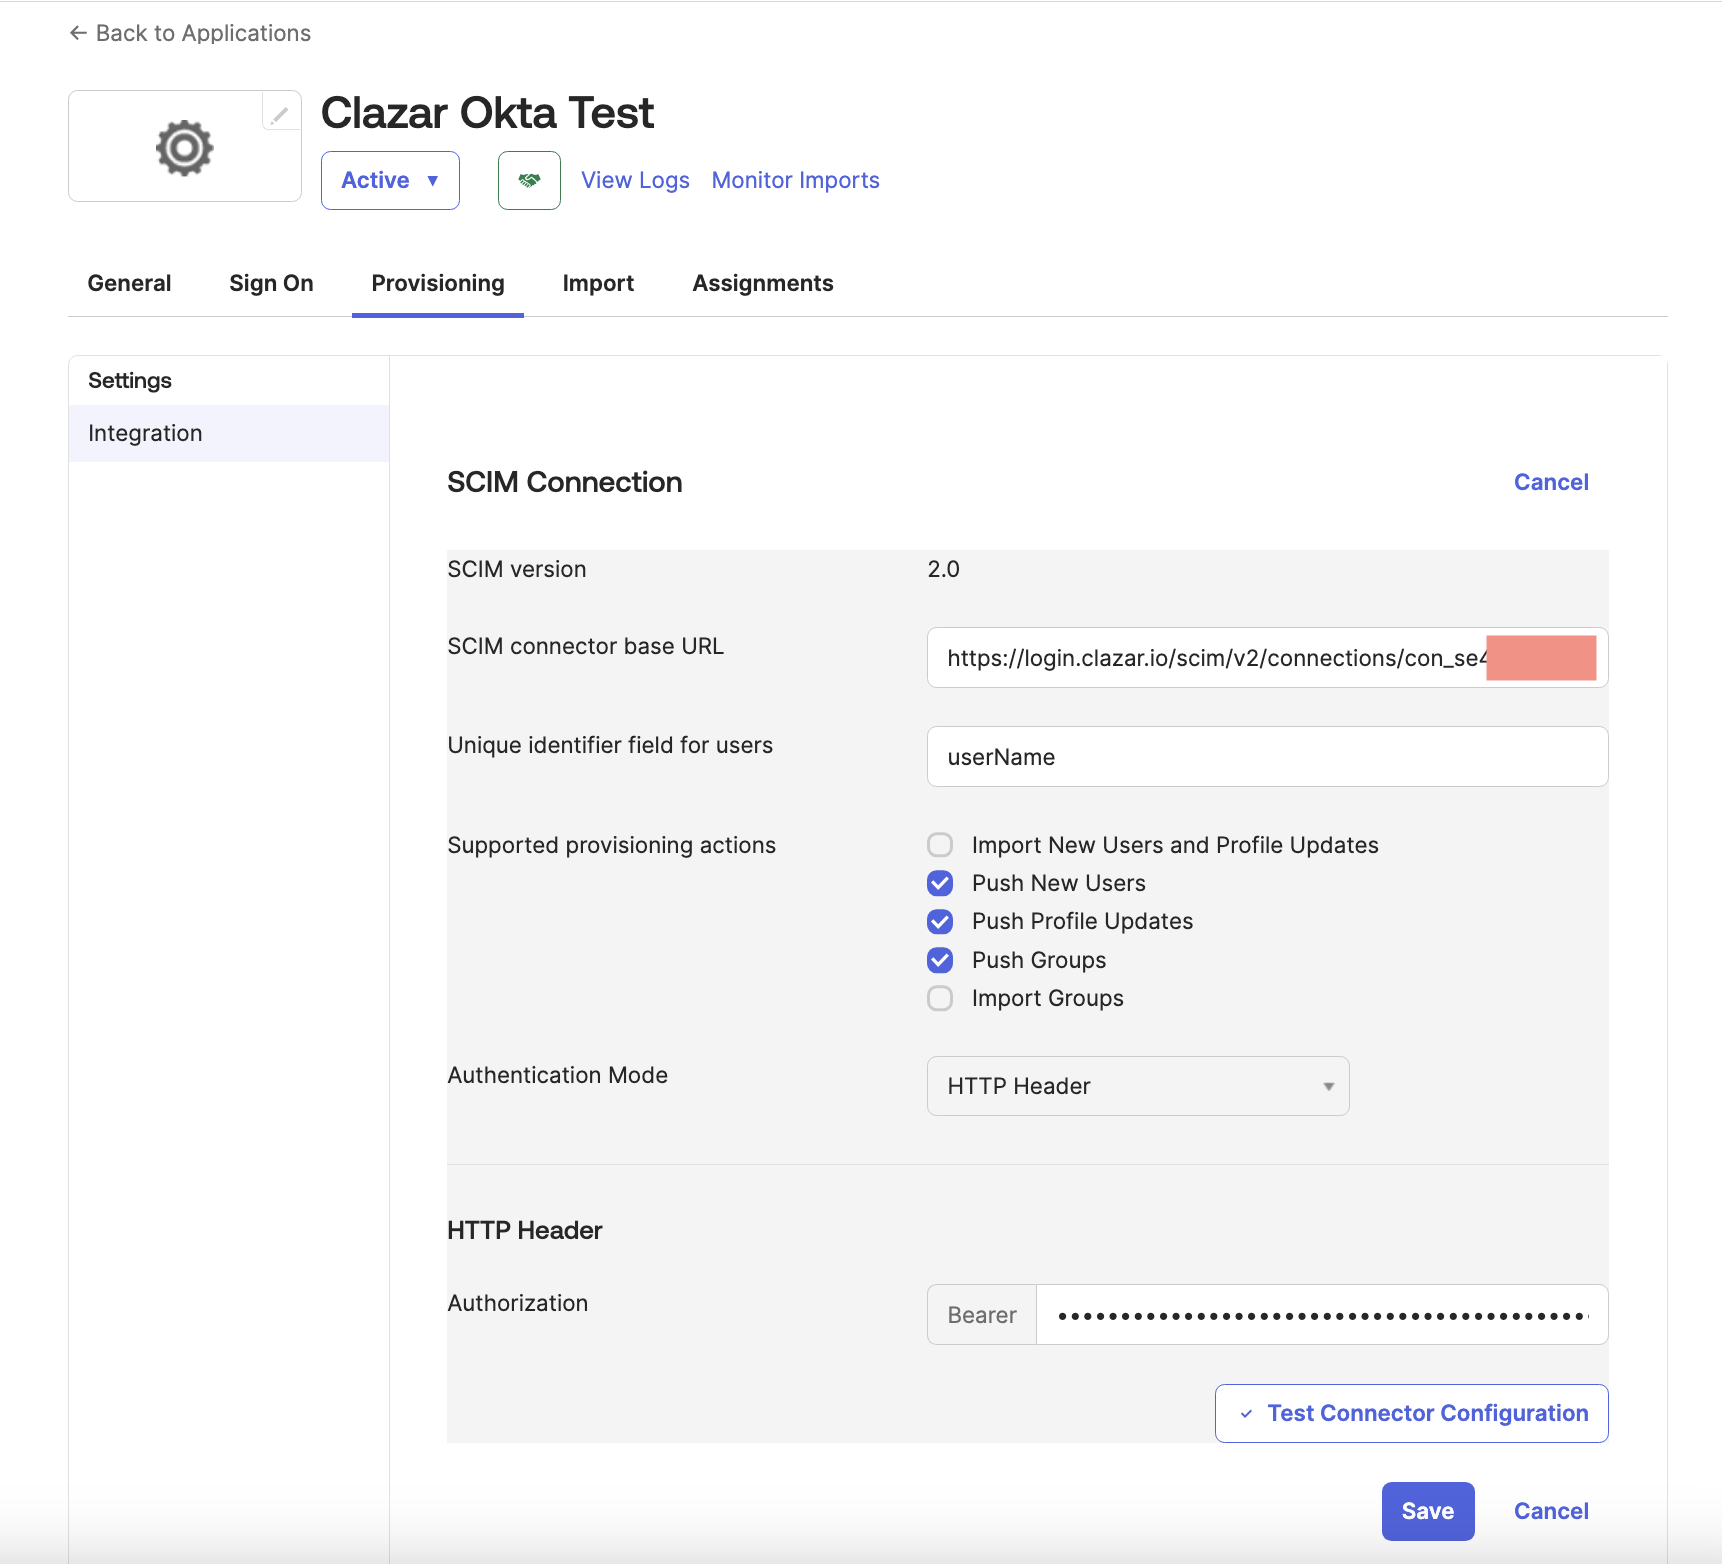
- In the
Provisioning Tab- Paste the SCIM API endpoint you copied from the Clazar dashboard.
- Set the
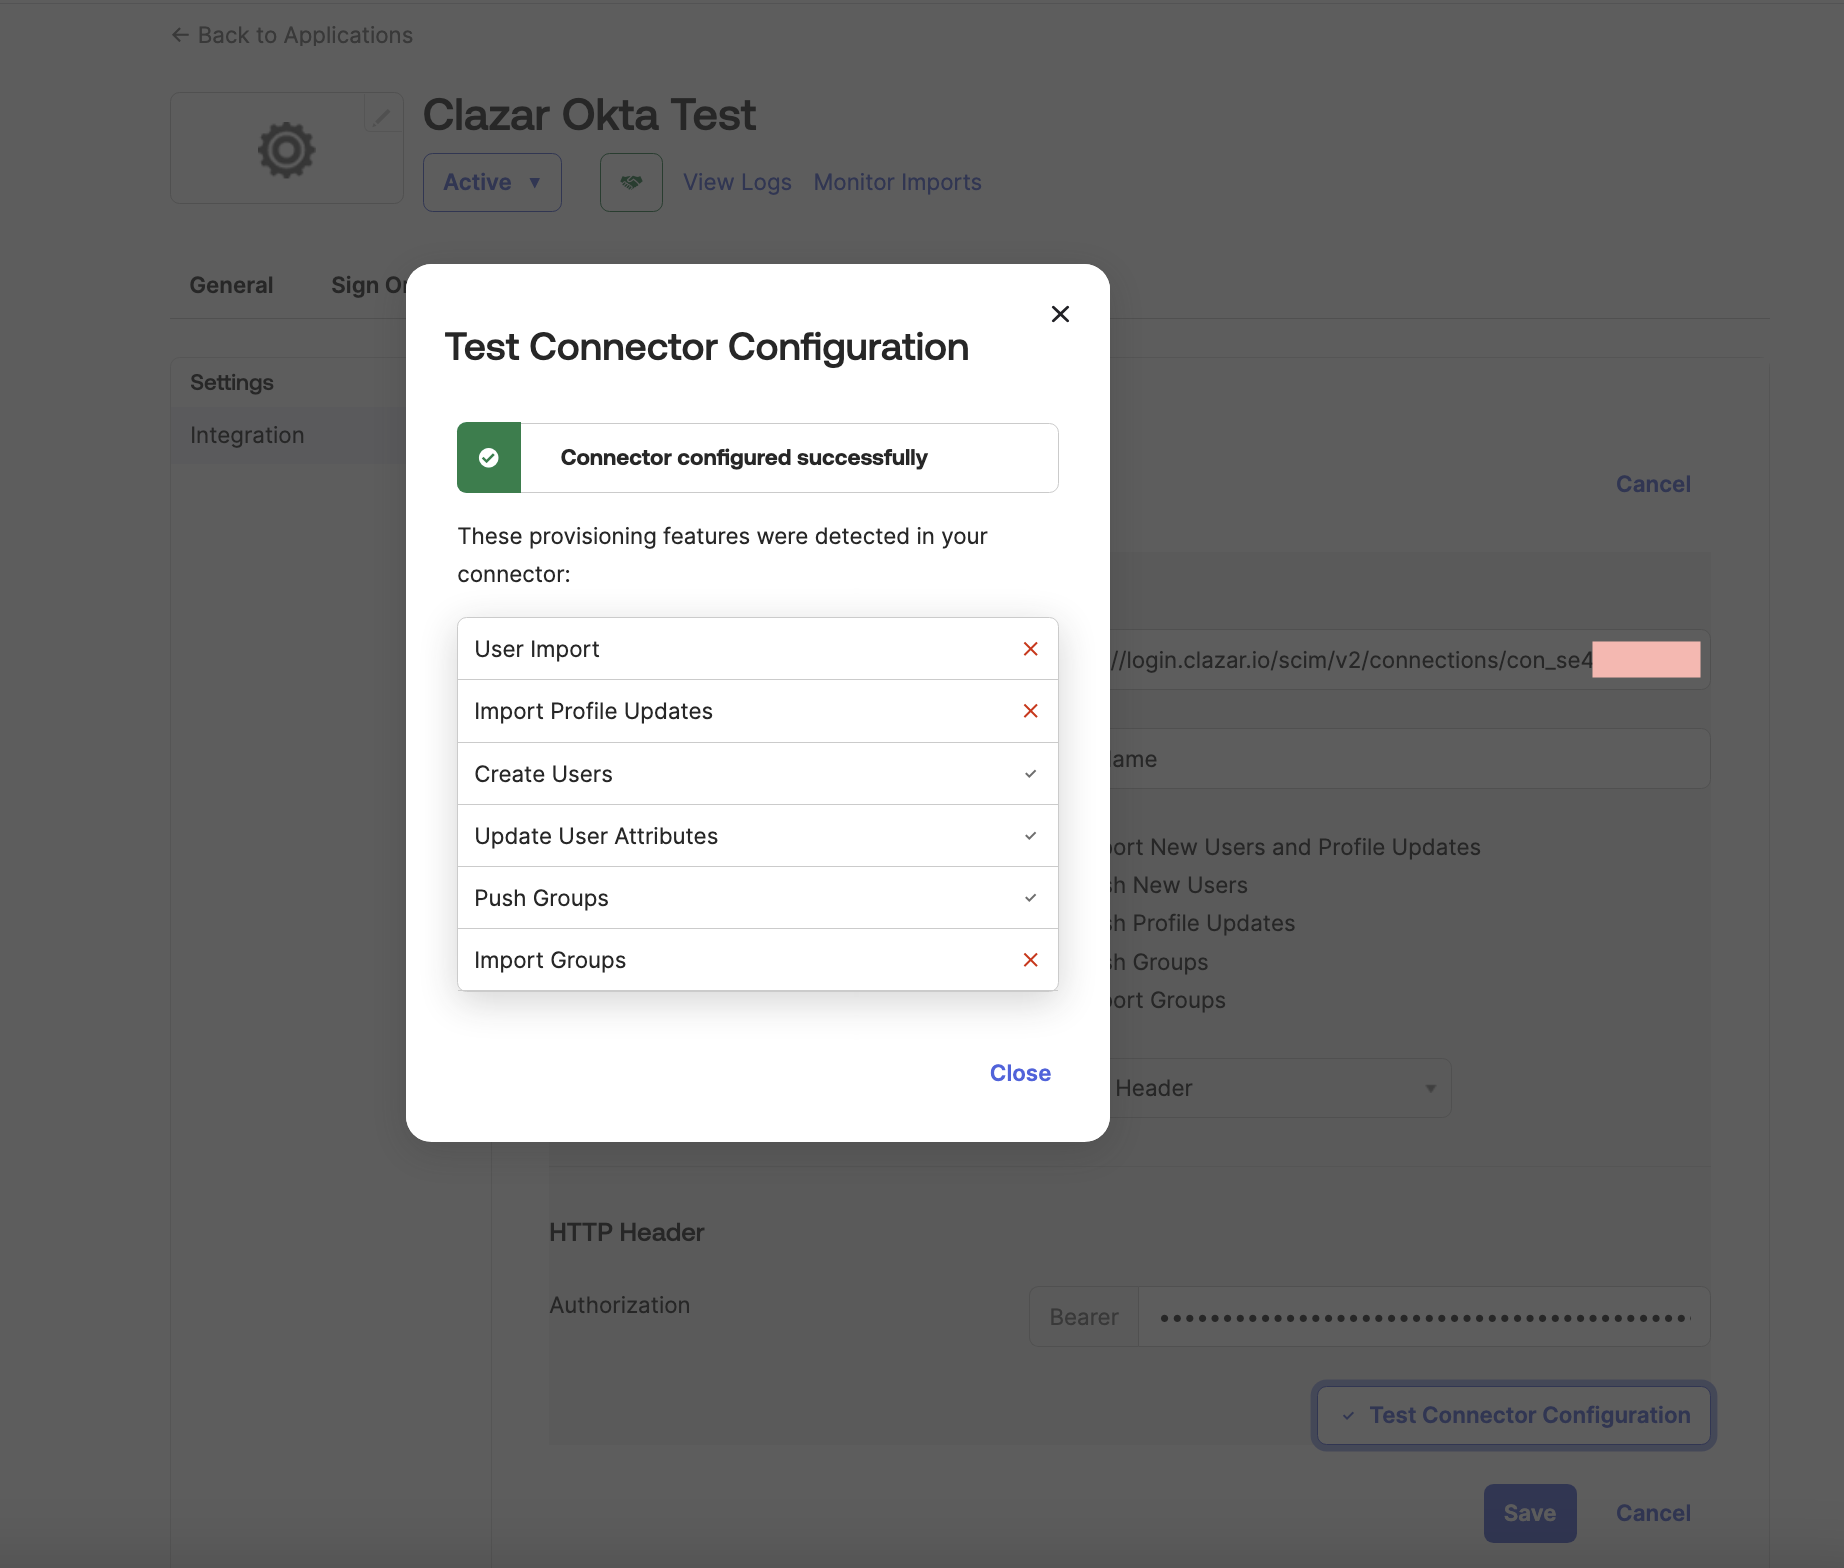
Unique Identifier Field for userstouserName. - Select the recommended provisioning actions (see the screenshot below for which options to enable).
- Change the Authentication Mode to
HTTP Header, and then paste the API key you copied from the Clazar dashboard. - Click
Test Connector Configurationto verify the connection. - Click Save.
Step 3
- In the
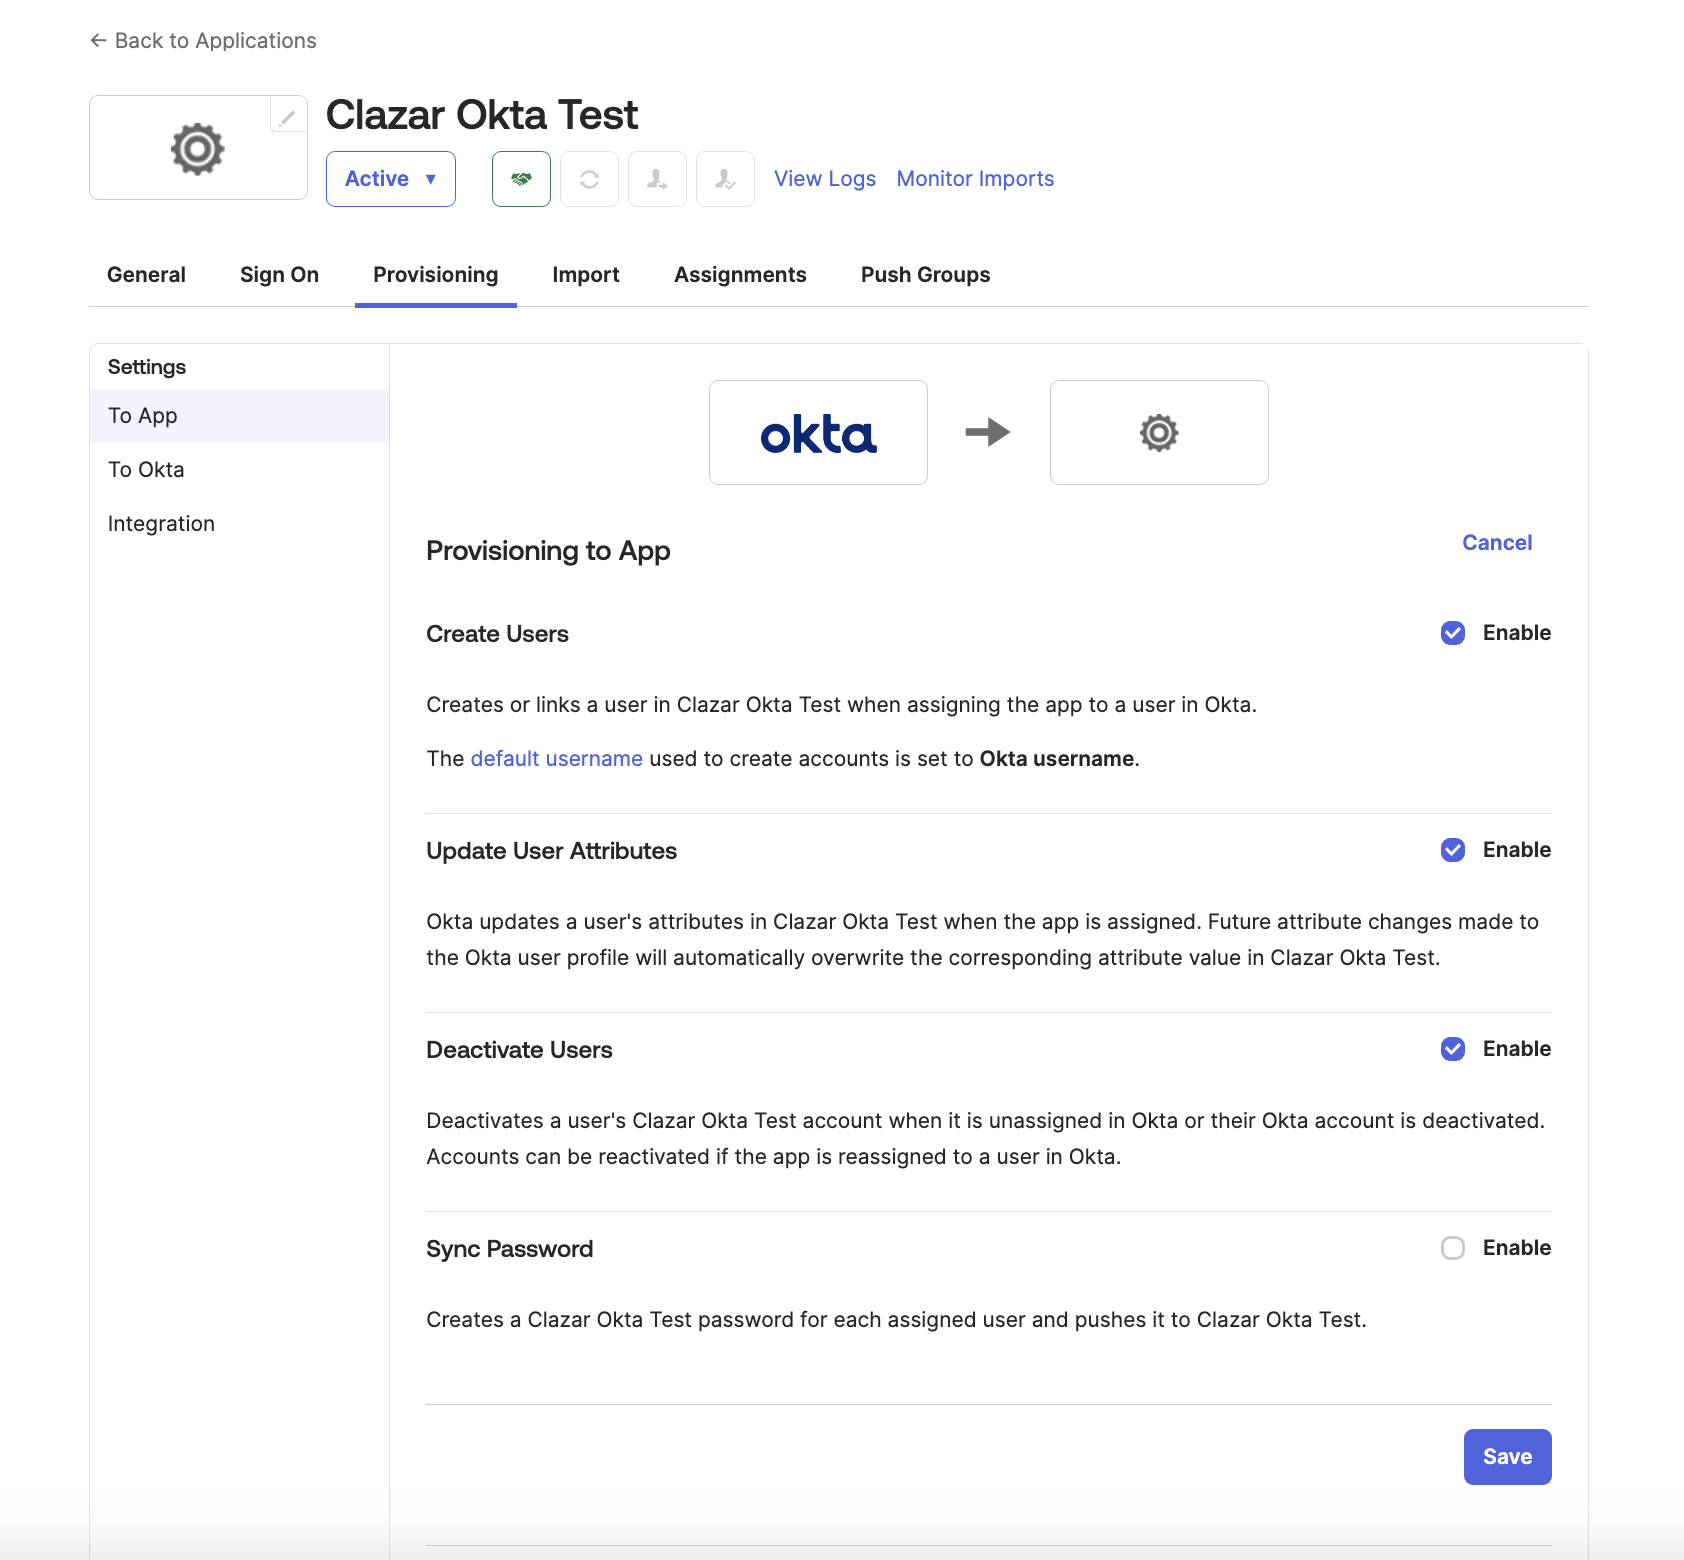
Provisioningtab, theTo Appsettings option is now visible. - Enable the following
Provisioning to Appoptions:- Create Users
- Update User Attributes
- Deactivate Users
- Save your changes.
Final Step
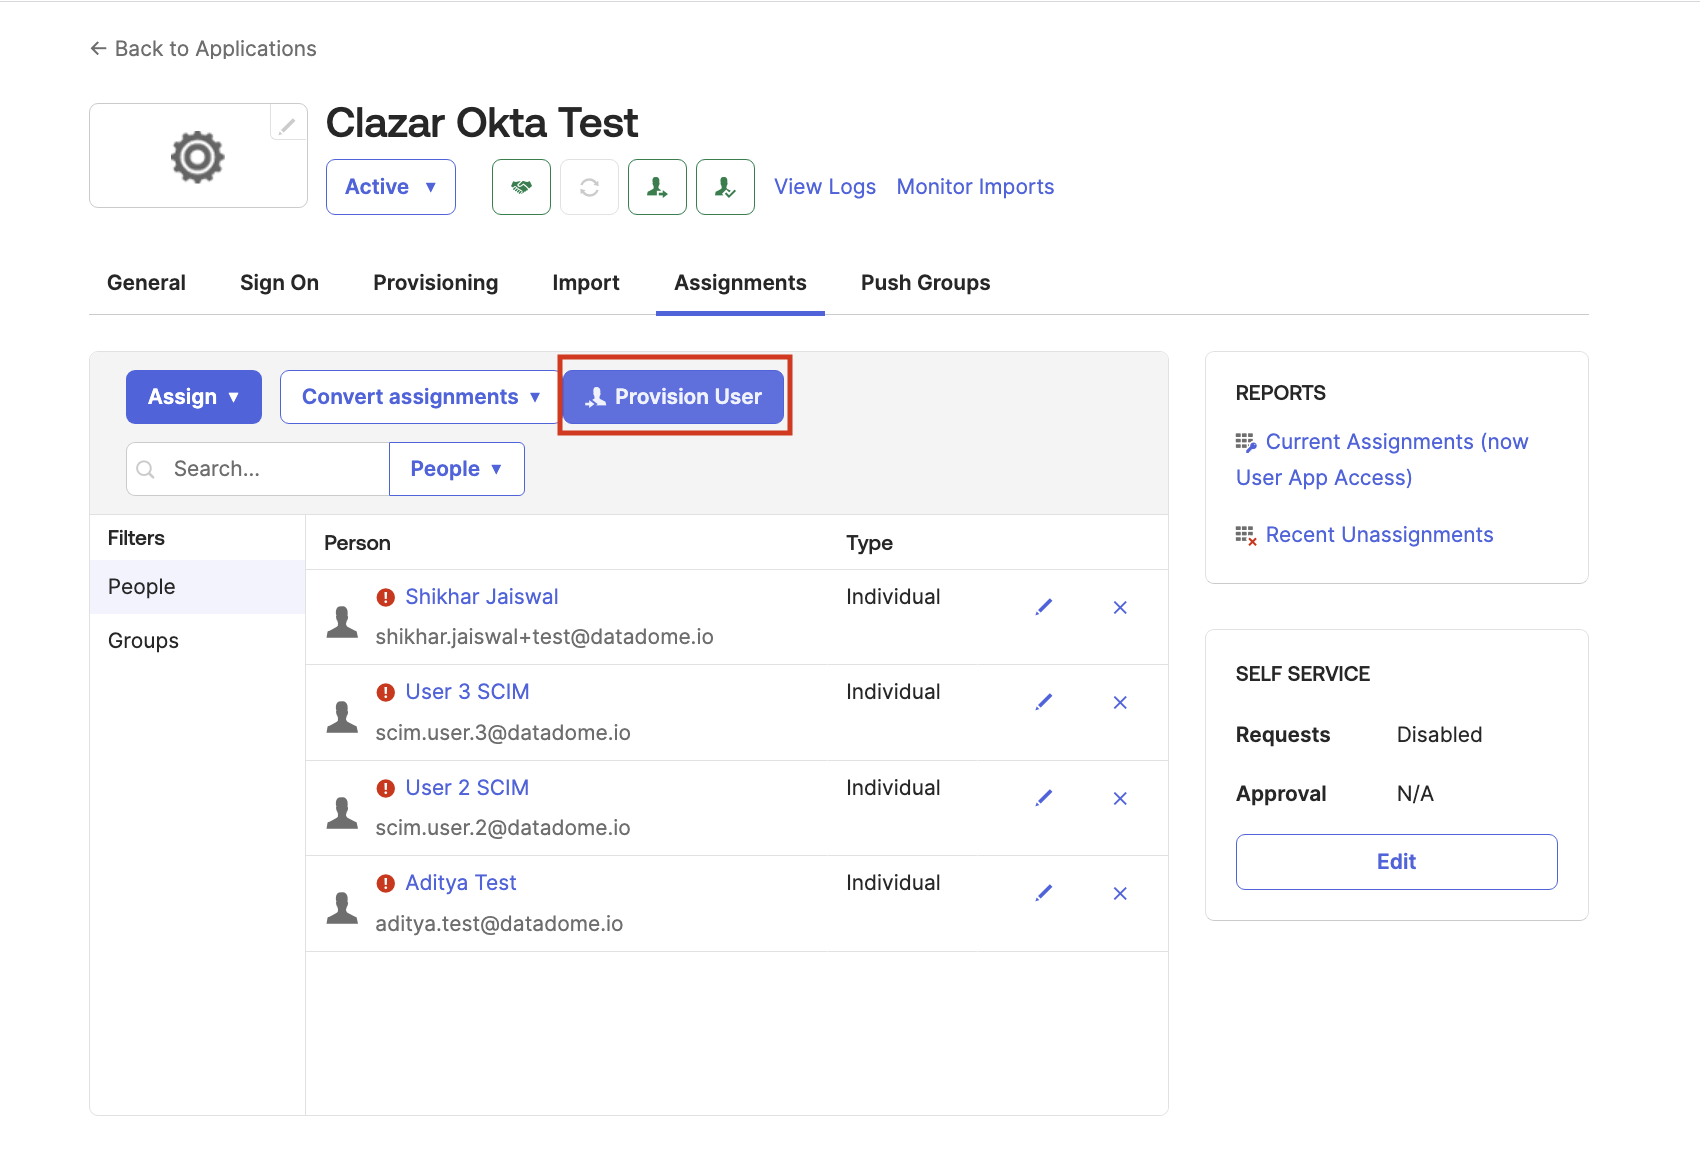
In the Assignments tab
- If any users were already assigned to this application in Okta, you might see a red icon next to them in the
Assignmentstab. - Click
Provision Userto sync those users with Clazar.
Updated 20 days ago